
The Mary Kaye finish is a slightly transparent blonde finish - much like Fender's blonde Telecaster finish but without any yellow tint (and very different from the more yellowed and more transparent butterscotch finish) - applied over ash wood and in combination with gold hardware.
The name comes from the association with Hawaiian female guitarist Mary Kaye - not the cosmetics empress Mary Kay ! Mary Kaye was pictured in Fender promotional photos around 1956, sporting a blonde Strat with all gold hardware - and the name stuck.
Fender's Mary Kaye finish is most often associated with the Stratocaster - on which it first appeared in 1954 - but it was available as a custom color on Jaguar's and Jazzmasters - and probably any other model for which there was gold hardware available during the early 60s. The finish reappeared on Fender custom shop models more recently - of course on Strats, but also on Precision basses.
While there were very few "Mary Kaye" instruments made back in the 50s and 60s - the few pictures I have seen do appear to show a yellowing that does make the finish look a great deal like an aged blonde 1960s Tele finish - perhaps with a bit more transparency - though blonde Tele's are all over the map in that respect.
A customer asked me to finish a very lightweight aftermarket swamp ash body in as close to a "new" Mary Kaye finish as I could - with an emphasis on also keeping the finish thin. I decided that I'd basically try to do a late 50s/early 60s Tele blonde finish, but make an effort to first highlight the grain in the swamp ash with a dark grain filler so that it would be highly visible through the blonde finish.
I unfortunately did not take pictures of the body BEFORE I started, but as a first step I lightly sanded the wood with 400 grit paper and a block to make sure the wood was clean - the body was actually very nicely sanded from the factory !
I then used a water-based grain filler on the body - Wunderfil brand Walnut grain filler - which was liberally applied - and then dry sanded off once it had dried. As with any grain filler, the object is always to just leave the filler in the grain, especially if the finish is going to show the grain (i.e. a blonde, natural or cherry finish).
And just a quick note - since the grain-filler I used was water-based, I obviously could not wet sand. You can wet sand with oil based fillers, but then I'd recommend first spraying a sealer coat of clear lacquer on the body so that the water doesn't raise the wood grain.
Here's the Strat body with the grain filler sanded off - ready for sealing with a clear coat. The dry filler is not very dark until it's hit with a coat of clear.


A clear coat was sprayed on - to seal the filler in - and this also really made the filler much more visible - and showed off how gorgeous the grain in this swamp ash is.


This single piece body was cut such that the crest of the grain was aligned with the center of the body - and neck. The owner theorized that this feature, combined with a tight neck pocket fit, would make this instrument particularly resonant !
The oval dark area is just figuring in the ash - its also visible in the earlier pics, but was high lighted by the grain filler.

Now it came time to apply the translucent blonde color coat.
I used a clear gloss nitro base, to which I added a dilute gloss white lacquer - I'd say about a teaspoon worth to 6 ounces of lacquer - and then thinned for spraying a light coat. Its better to put too LITTLE white in than to put too much in - you can always build up the blonde coat.
After the initial coat of blonde - the body had a distinctly "pinkish" tint - which was from the wood color - but it was surprising, since with the clearcoat over the grain filler that wood didn't look pink at all !! I unfortunately can't find any pictures of that stage of the refinish (maybe I forgot to take them!) - but after looking at pictures online of reissue Mary Kayes and confering with the owner, I decided to make the blonde finish a little more opaque AND add the tiniest amount of a brown tint to the white. I added some brown dye to some clear lacquer - and then just added it drop by drop til there was just the slightest "tan" cast to the white - very subtle. I decided against adding an amber dye, as I didn't want a "buttery" aged looked to the finish - just a milky white look.
Adding another coat of blonde accomplished what I wanted - I'm not sure if this is because the swamp ash is a slightly different color than what Fender typically uses under a blonde finish or if the Mary Kaye finish does have a very subtle brown tint to it ?
Once the color was right - the body did require quite a few clear coats to fully seal the grain of the ash - the texture was still a little visible through the blonde finish.

After a few weeks of curing, wet sanding and buffing out - the finish was where I wanted it.
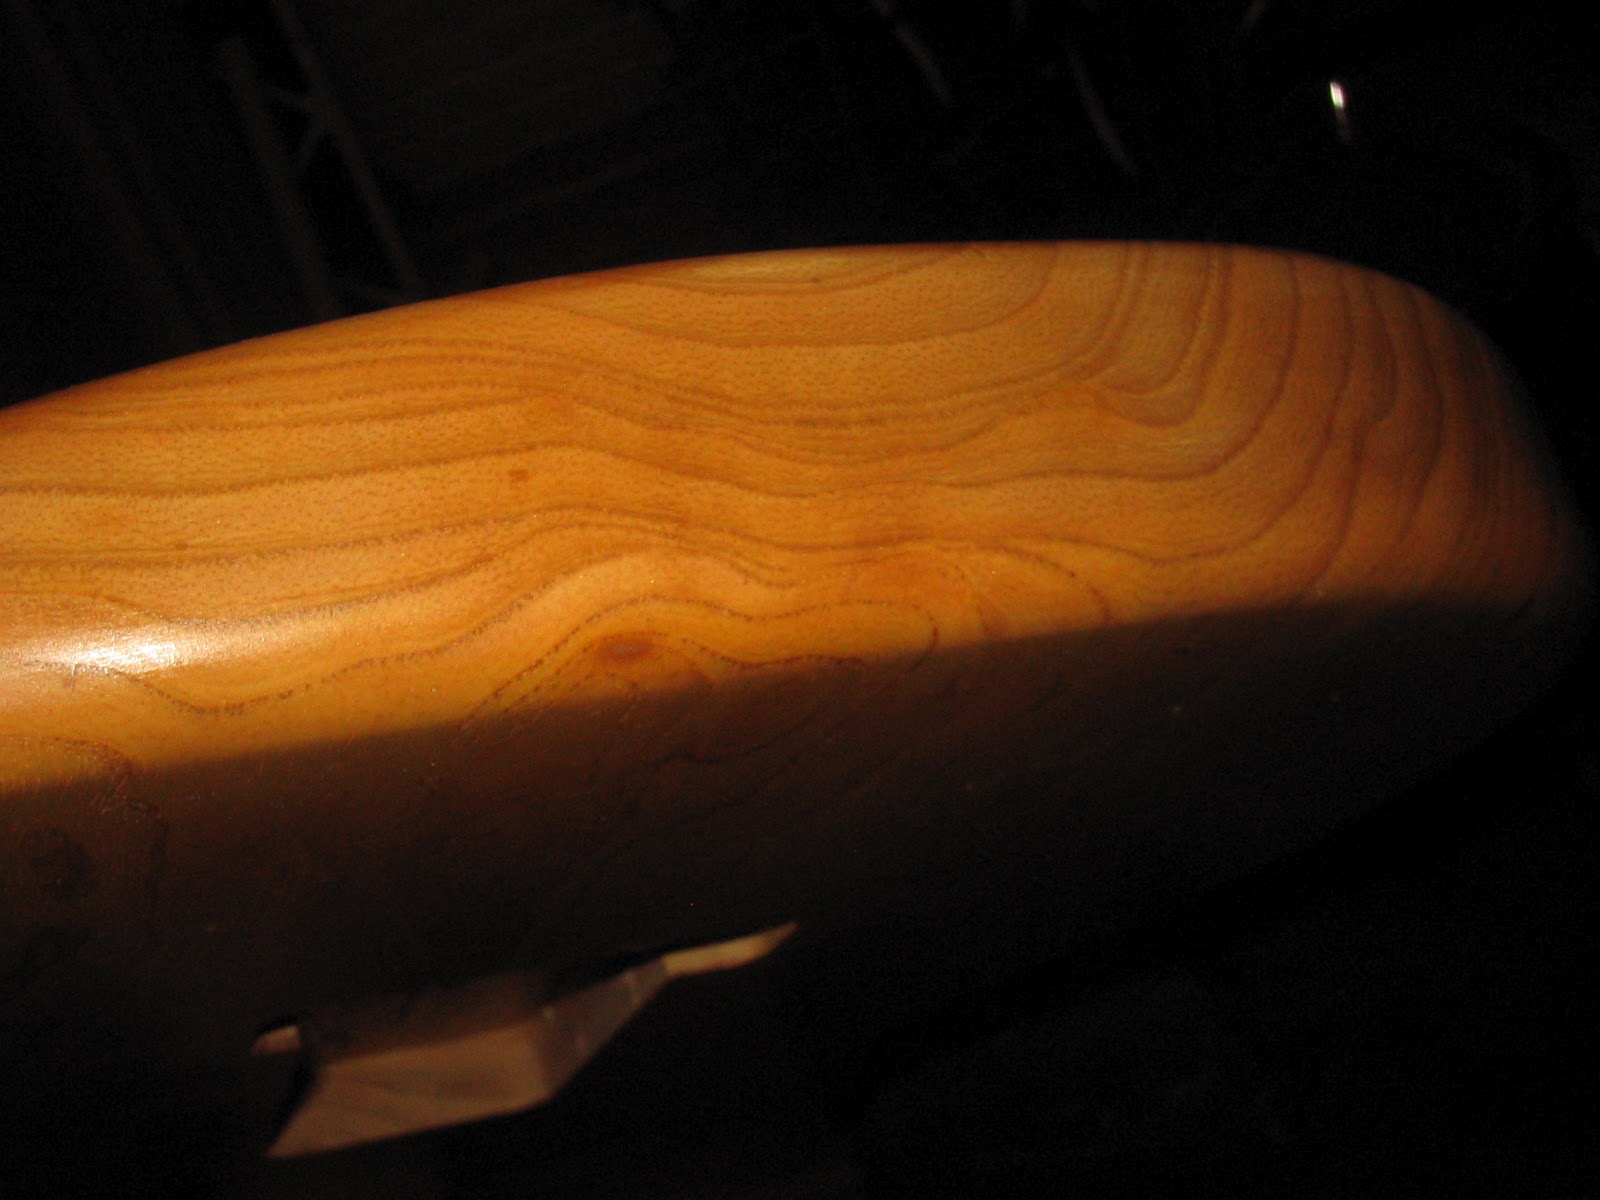
It can be hard to capture the translucent nature of a Mary Kaye finish - but this close-up shows the grain of the ash through the finish.

I unfortunately didn't have a gold Strat bridge and jack cup to model the completed body, but here it is with a pickguard dropped in. Look carefully and you can see the grain showing through the finish - as well as a slight slight pinkish tinge from the swamp ash. Over time, this finish will yellow and look more and more like a vintage Tele.

I think in the future I might try an even darker grain filler to highlight the grain - I have recently started using Timbermate Ebony Woodfiller for my mahogany work, and it really emphasizes the grain. With the Mary Kaye finish, if the grain is TOO prominent, I can simply add another coat of translucent blonde until I have the level of grain definition I want.


Hi, I'm going to attempt this same finish in a few days. I was hoping for some advice/help on sealing the body. Should I spray a sanding sealer coat prior to or after grain filling the body?
ReplyDelete-thanks
Hey there - I would spray a very light (and thinned) clear coat of normal clear lacquer first. Then apply your grain filler - sand it back, etc. Since I did this guitar, I have done many other blonde finishes - and I would definitely use a darker grain filler. I now usually use a blend of the brown "walnut" grain filler with a little of the ebony/black grain filler mixed in to darken it. Using a darker filler allows you a little more leeway in the spraying the translucent white part of the finish.
ReplyDeleteOnce the grain is filled and sanded, then shoot a sealer coat over it - either sanding sealer or vinyl sealer. If some areas look like they still need some grain filler at this point, do another round of grain filling and spray another sealer coat over that.
Let that set up - black sand it as smooth as possible - and then do the translucent white coats.
You can email me directly if you want more details: guitargarageusa@gmail.com
Cheers!
Krishna