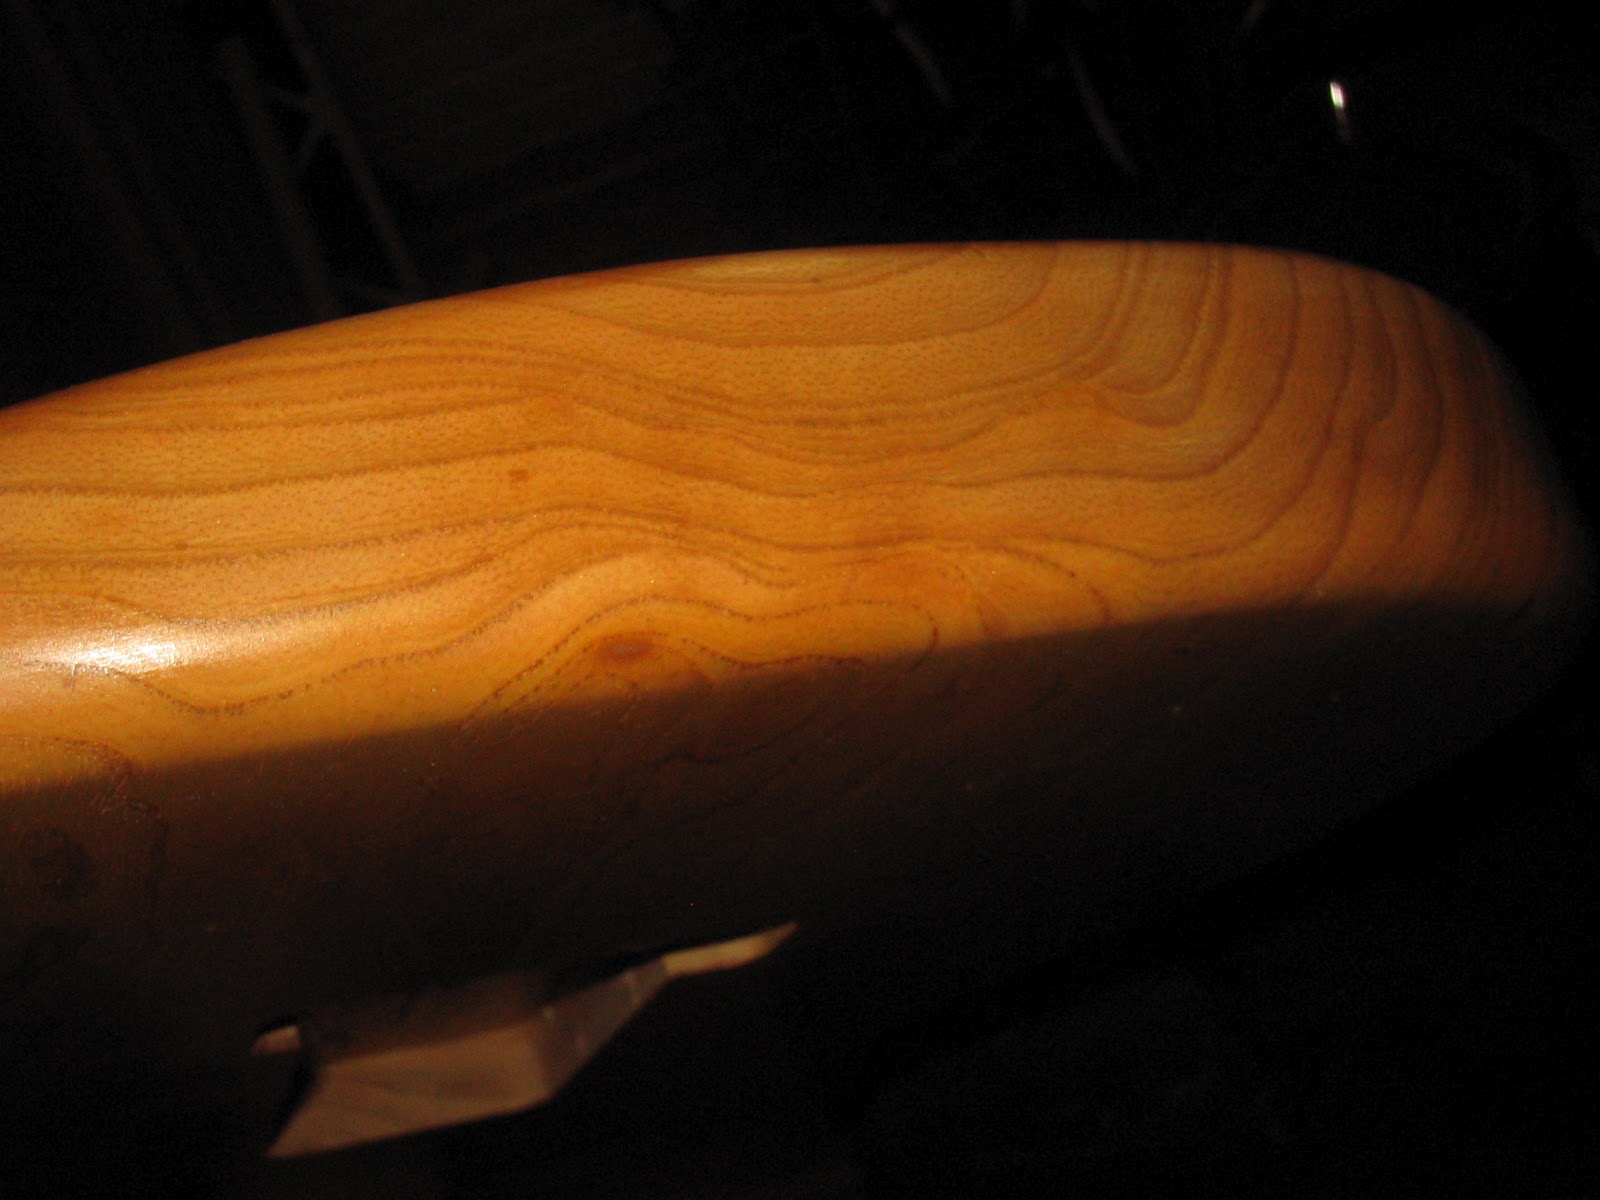
The Mary Kaye finish is a slightly transparent blonde finish - much like Fender's blonde Telecaster finish but without any yellow tint (and very different from the more yellowed and more transparent butterscotch finish) - applied over ash wood and in combination with gold hardware.
The name comes from the association with Hawaiian female guitarist Mary Kaye - not the cosmetics empress Mary Kay ! Mary Kaye was pictured in Fender promotional photos around 1956, sporting a blonde Strat with all gold hardware - and the name stuck.
Fender's Mary Kaye finish is most often associated with the Stratocaster - on which it first appeared in 1954 - but it was available as a custom color on Jaguar's and Jazzmasters - and probably any other model for which there was gold hardware available during the early 60s. The finish reappeared on Fender custom shop models more recently - of course on Strats, but also on Precision basses.
While there were very few "Mary Kaye" instruments made back in the 50s and 60s - the few pictures I have seen do appear to show a yellowing that does make the finish look a great deal like an aged blonde 1960s Tele finish - perhaps with a bit more transparency - though blonde Tele's are all over the map in that respect.
A customer asked me to finish a very lightweight aftermarket swamp ash body in as close to a "new" Mary Kaye finish as I could - with an emphasis on also keeping the finish thin. I decided that I'd basically try to do a late 50s/early 60s Tele blonde finish, but make an effort to first highlight the grain in the swamp ash with a dark grain filler so that it would be highly visible through the blonde finish.
I unfortunately did not take pictures of the body BEFORE I started, but as a first step I lightly sanded the wood with 400 grit paper and a block to make sure the wood was clean - the body was actually very nicely sanded from the factory !
I then used a water-based grain filler on the body - Wunderfil brand Walnut grain filler - which was liberally applied - and then dry sanded off once it had dried. As with any grain filler, the object is always to just leave the filler in the grain, especially if the finish is going to show the grain (i.e. a blonde, natural or cherry finish).
And just a quick note - since the grain-filler I used was water-based, I obviously could not wet sand. You can wet sand with oil based fillers, but then I'd recommend first spraying a sealer coat of clear lacquer on the body so that the water doesn't raise the wood grain.
Here's the Strat body with the grain filler sanded off - ready for sealing with a clear coat. The dry filler is not very dark until it's hit with a coat of clear.
A clear coat was sprayed on - to seal the filler in - and this also really made the filler much more visible - and showed off how gorgeous the grain in this swamp ash is.
This single piece body was cut such that the crest of the grain was aligned with the center of the body - and neck. The owner theorized that this feature, combined with a tight neck pocket fit, would make this instrument particularly resonant !
The oval dark area is just figuring in the ash - its also visible in the earlier pics, but was high lighted by the grain filler.
Now it came time to apply the translucent blonde color coat.
I used a clear gloss nitro base, to which I added a dilute gloss white lacquer - I'd say about a teaspoon worth to 6 ounces of lacquer - and then thinned for spraying a light coat. Its better to put too LITTLE white in than to put too much in - you can always build up the blonde coat.
After the initial coat of blonde - the body had a distinctly "pinkish" tint - which was from the wood color - but it was surprising, since with the clearcoat over the grain filler that wood didn't look pink at all !! I unfortunately can't find any pictures of that stage of the refinish (maybe I forgot to take them!) - but after looking at pictures online of reissue Mary Kayes and confering with the owner, I decided to make the blonde finish a little more opaque AND add the tiniest amount of a brown tint to the white. I added some brown dye to some clear lacquer - and then just added it drop by drop til there was just the slightest "tan" cast to the white - very subtle. I decided against adding an amber dye, as I didn't want a "buttery" aged looked to the finish - just a milky white look.
Adding another coat of blonde accomplished what I wanted - I'm not sure if this is because the swamp ash is a slightly different color than what Fender typically uses under a blonde finish or if the Mary Kaye finish does have a very subtle brown tint to it ?
Once the color was right - the body did require quite a few clear coats to fully seal the grain of the ash - the texture was still a little visible through the blonde finish.
After a few weeks of curing, wet sanding and buffing out - the finish was where I wanted it.
It can be hard to capture the translucent nature of a Mary Kaye finish - but this close-up shows the grain of the ash through the finish.
I unfortunately didn't have a gold Strat bridge and jack cup to model the completed body, but here it is with a pickguard dropped in. Look carefully and you can see the grain showing through the finish - as well as a slight slight pinkish tinge from the swamp ash. Over time, this finish will yellow and look more and more like a vintage Tele.
I think in the future I might try an even darker grain filler to highlight the grain - I have recently started using Timbermate Ebony Woodfiller for my mahogany work, and it really emphasizes the grain. With the Mary Kaye finish, if the grain is TOO prominent, I can simply add another coat of translucent blonde until I have the level of grain definition I want.
read more →
This project belongs to a customer who found this 1968 Telecaster that had been through a lot of changes but offered the basis for an excellent restoration. The guitar body had been stripped and routed for humbuckers. In addition, the body had some serious dinging/denting on the rear from being played with no finish. On the plus side, the body is probably the lightest Fender guitar body I have ever come across.
The remnants of the finish in the neck pocket and control cavity revealed that Telecaster had the classic blonde finish originally. I showed the owner my long dormant project 1966 Telecaster and we agreed I'd try to replicate its blonde finish. The Tele blonde finish differs from the Olympic White finish Fender used during the 60s in that it was translucent, so that some of the grain is actually visible through the finish. This also obviously meant that this finish uses no white primer coat - and just a thin color coat, with a clear topcoat that yellows to give the characteristic buttery look of 60s Teles.
Below is a picture of my 66 Tele - one day I'll fix those routes on this baby and post its story - which is pretty wacky !!

Note how much lighter the color of the body is under the guard. A look at the edge of the body where there has been wear reveals that this Tele was probably almost white when it was new, but aging gave it the classic Tele look.

The first step was to clean up the routes to allow for gluing in of clean plugs prior to re-routing for the neck pickup and the diagonal wiring rout. I decided to plug the routes with maple, since I didn't have any ash for plugging and the color of the maple was similar to the light colored ash of the body.

Once the routing was complete, the plugs were cut and glued in place. A few small pieces were also glued in to fill in some gaps, also of maple.


With the body plugged, it was time to layout the re-routing of the body. The owner decided to install a strat pickup in the neck position and requested I rout for the slightly larger size pickup. Other than that, I tried to make the routing as close to stock as possible.

The rear of the body had some dings and grooves pressed into the wood - presumably from someone's huge ZZ Top belt-buckle during the 70s! I used the classic dent steaming technique - in whish the wood is first wetted with water, and then a soldering iron with a wet cloth is placed against the dented area to swell the wood back up. This approach successfully popped out some of the dents and grooves on the back, though one area along a grain like appeared to actually be worn away, maybe during the stripping process years before. As I noted - this Tele had a very lightweight - and soft - ash body.

The body edges were then block sanded and hand sanded with 220 grit paper - and the body was finally ready for a vinyl sealer coat.
Two heavy coats were applied - with some light sanding of the front and back faces of the body with 320 grit paper afterwards. The body was now ready for its first color coat.

To mix the color coat, I started with standard gloss white nitro lacquer (from my friends at Eastern Chem-Lac) and added a small amount of Sheffield's Tintsall Medium Yellow, which sort of an ochre color pigment paste. A little goes a LONG WAY .. so just add a little at a time - mix thoroughly - and then add more if needed. Otherwise you may end up in a Pee Wee Herman-esque "Ice Cream Soup" situation (look it up on YouTube if you have no idea what I'm talking about ...).
Once I had a small jar of the buttery color I wanted (I compared it to paint that was in the pickup routings of my 66 Tele), I mixed it 1 part color to 2 parts clear gloss nitro, and then thinned it for spraying. I mixed up plenty so I'd have enough for any resprays I'd have to do on the guitar.

The key is to be patient and build up the color slowly - again, the goal was to achieve a translucent finish that left the grain of the ash just barely visible.
I sprayed the routing repair area first, since I wanted to do as much as possible to hide the patches in that area (though they will be under a pickguard) - and then I applied an even light coat over the entire body - spraying each surface with 3 or 4 passes. As you can see - the grain is very prominent, but the color is getting there.


After letting the first coat dry for about an hour, I added a second heavier coat - I planned on this being the final color coat - any additional darkening will come from an aged/ambered clearcoat.
The opacity ended up much higher after the second coat - which was accomplished with about 4 passes over all the surfaces, including the edges. However, the second picture below, the close-up, reveals that the grain is still visible - this is probably very much what a 68 Telecaster looked like new from the factory IN 1968. But a nice aged topcoat will give this Tele the familiar "old Telecaster" look when I'm done.


(Update - October 17th, 2008)
The open grained ash of this light-weight Telecaster required many clear coats - followed by wet sanding - to level the grain with the rest of the surface. In retrospect, the body should have probably received several extra coats of sealer BEFORE the color coat, but the difficulty is seeing the grain when using a clear sealer coat. One of the many reasons solid-color finishes are so much easier - the white primer really highlights any imperfections and open grain.
But finally - a nice smooth finish was achieved, and the Telecaster was reading for the "aged" clear coat that would darken the finish to a more vintage look. The owner and I decided to simulate the uneven yellowing that occurs between areas on the guitar body that are covered by hardware and those that are not.
I once again used my 66 Telecaster as a guide - the picture below illustrates the difference in color between covered and uncovered areas.

I then cut cardboard forms out to cover the areas I didn't want to tint - fitting them to the 66 Tele as a check.

The next step was to come up with a good level of tinting for the clear lacquer coat - its easy to overdo it at this stage and give the guitar a very bogus look - or to get a run in the clear coat and ruin a paint job right near the end (this is one reason I generally don't offer to do aged clearcoats - though I may start offering it as an option).
I had sprayed a test piece of masonite with the buttery-tinted white finish I used as the color coat on the Tele - and I used this to test out my tinting to see if I'd get the desired results and make sure I had a mixture that was controllable in terms of the stregth and depth of color.

Then I attached the cardboard forms to the Tele body - using small pieces of cardboard as spacers to slightly raise the forms off the surface of the guitar body - this gives the untinted areas a slightly soft edge - which is what is seen on genuine vintage finishes. Note how you can still just see the grain of the ash through the blonde finish (click on the image to see a full-size view).


Now the spraying ! I did it in three light coats - doing the front, back and edges - waiting a few minutes - and then again - trying to make the tinting as even as I could. The lighting is a little off in this picture, so the body looks darker than it is.


But for a real impression of the results - the unmasking !
Compare this to the picture of the 66 body further back in the post - its a similar effect, though not tinted as dark. The final step will be another clear coat over the tinted coat to seal it in and allow me to do a final wet sanding and buffing of the finish without cutting into the tinted coat inadvertently.

It will be possible for the owner to get a more "relic'd" look by taking sandpaper to the edges of the body - which will reveal the untinted blonde color and eventually the sealed ash underneath - much like on my 66 Telecaster.
(Update Nov. 1, 2008)
The owner has assembled the Tele and given it a workout - and been kind enough to snap a few pictures of the complete instrument. Note that these are all original parts he's managed to gather up - including the case I believe !!
I have to get my '66 put together .. someday ...


 read more →