I decided to see if I could repair the original neck, since it had a completely different profile (smaller) than the replacement neck and it would add to the value of the guitar IF it could be made playable again. Plus I like a challenge !

A Poor Sad Old Neck
The neck had at some point been fitted with 3 extra tuners and also been defretted and the slots filled with wood putty. Not sure what kind of music you play on a 9-string fretless guitar - maybe some kind of experimental drone stuff, like early Sonic Youth or Glen Branca ??Anyway - beyond the extra holes and missing frets, the fretboard was very heavily worn by the strings (almost scalloped) and also missing a few chunks of the rosewood veneer fretboard and had what at first appeared to be a twist to the neck.
On the plus side, the neck had a nice worn finish on the back that was very comfortable, the original neck date stamp and the truss rod worked.
Below are some pics of what I started with.
 |
| Extra tuner holes, note heavy fretboard wear ! |
 |
| Filled fret slots and missing rosewood chunk |
 |
| Another view of the extensive fretboard wear |
 |
| Nicely worn finish on the back of the neck |
 |
| Jun 1963 neckdate - but notice that the right side is shorter than the left side ! |
I actually took the neck by Steve Morrill, a Boston guitar repairman, to see if he though the neck could be heated and untwisted. Steve looked at the neck for a few seconds and then said "its not twisted - the heel is uneven".
And he then pointed out that one side of the heel was shorter than the other - and therefore sighting down the back of the neck, the plane of the heel was not the same as the plane of the back of the headstock.
But the flat of the heel had the various small factory pencil marks - and the original finish on it - so the uneven heel was the way this guitar came out of the factory in 1963 !! Meaning this instrument definitely had a few of the trademark red plastic heel shims on one side when it shipped to the dealer. Just an indication of how inconsistent Fender's standards were in the pre-CBS days - the Jaguar was Fender's top of the line guitar, above both the Jazzmaster AND Stratocaster !!
Fixing the Fretboard
To assess what I had to work with, I lightly sanded the fretboard with a radius block (7.25 inches) after first adjusting the truss rod to flatten out the neck as much as possible. This clearly revealed the low spots on the fretboard.


Because the wear was so deep, I decided to repair the rosewood as opposed to planing it down to get rid of the wear divots. I used a technique I had used many years ago on a very worn 1966 Melodymaker, which had held up well over time.
The technique basically uses rosewood powder and cyanocrylate glue (super glue) to fill gaps and low areas. The resulting composite is very hard, bonds well and looks like dark rosewood, but obviously without any grain.
I used rosewood powder I had saved from a previous fretboard shaping project - I actually have three different colors of rosewood due to the variation in fretboard materials used out there. I picked one that I thought would match the fretboard once the glue darkened it up - and started applying small mounds of it wherever there was a divot. I also cut a small rectangle of rosewood to patch the missing chunk at the high end of the fretboard.

I leveled the "filler dust" with the edge of a razor - and then generously applied some Medium consistency cyanocrylate glue to each area - and glued the rosewood chunk in place with the same glue.
I also filled in some fretslots that were heavily chipped during the defretting and applied glue along these areas as well.
I then sprayed the whole fretboard with an accelerator spray (Rockler brand, but anyone will work) to set the glue almost instantly.
Note that I also slightly drilled out the fronts of the extra string holes and an extra string tree hole and filled them with grey epoxy.
The result is NOT attractive - with large blobs of rosewood/plastic sitting on the fretboard !!

 |
| Looks like some kind of cancerous growth !! |

Despite the use of accelerator spray to harden the glue, I decided to let the glue fully cure overnight since it was quite heavily applied in some areas and I wanted it fully hardened before I started leveling it.
I sanded the fretboard with the radius block again and heavy grit paper - and when I was done, there were still some low areas - some in the areas I had already filled and some that I neglected to fill during the first pass.
Since these areas were not very deep - I switched to a Thick consistency cyanocrylate and applied it to the low spots.

The second application did the trick - sanding the fretboard again resulted in a nice flat surface - with the filled areas visible as dark patches. I knew that after oiling, the color would blend in much more plus the patches would be less prominent on the assembled guitar since they would be under the strings!
The fretboard patch would be getting a local application of dark walnut dye to darken it to the color of the surrounding wood.


Next came the time to clean out and in some cases, recut the fret slots and to install the frets. I used StewMac's standard guitar fretwire and their matching .023 width fretting saw. The fretwire is probably a bit bigger than the original Fender wire from 1963, but it would give me ample room to work the frets if necessary once the neck was under tension.

The slots, cut, the frets bent, cut roughly to length and placed.

I installed the frets and used a small amount of hide glue to hold them in, since the slots in some cases were a little loose. I then used the radius block as a clamping block and let the glue dry overnight.


The next day I finished fretting the rest of the neck. Once all the frets were in, I did have to go back and individually clamp and glue a few frets, using a small drop of Thin superglue, so that the capillary action would pull the glue into the fret slot.
The frets did need a little leveling here and there once the neck was under tension - a few iterations, some filing, some polishing and eventually the action was low and even across the neck.
The Rest of the Guitar
As I've covered many refins in this blog already, I'm not going to go into detail on the rest of the work on the guitar, except for one interesting little detail - stripping the painted over original pickguard!
The pickguard that came with the guitar was black, but from the back of it and the edge bevel, I was pretty sure it was the original mint green guard that had come with the Jag from the factory.
I didn't want to use a paint stripper, since it would attack the plastic, I used 400, 600 and 1000 grit wet & dry paper, with plenty of water. As you can see the black paint came off very quickly.


I then finished up with some buffing compound and some very light buffing, as I didn't want to buff through the patina/aging that survived under the paint !

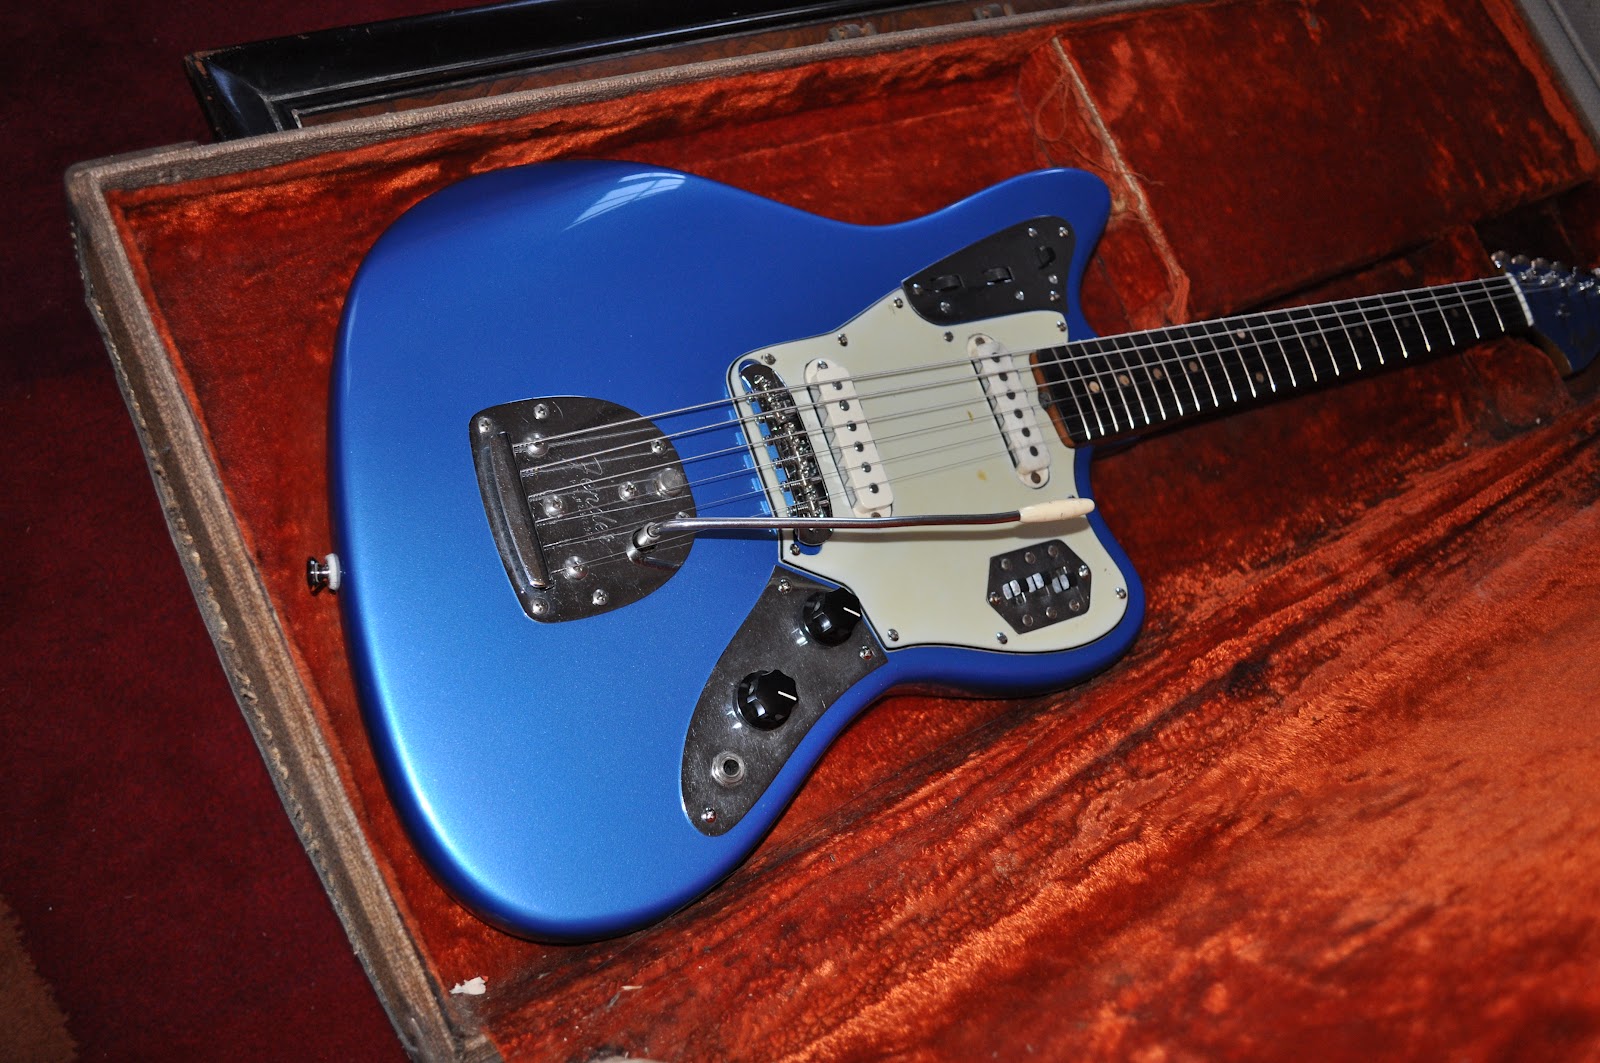
The owner saw another Jaguar I did in Lake Placid Blue and asked for that color for her guitar as well, with a matching headstock to cover up the additional tuner holes and string tree. The body was in surprisingly good shape and finishing the body and headstock went smoothly. The hardware is a mix of original and replacement parts (one pickup was dead and was replaced).
 |
| Ah the fun of wiring a Jaguar !! So many switches and pots !! |
As you can see in this pictures - the fretboard ended up looking fine - the clay dots were preserved - and after a bit of shimming, the guitar set up nicely and played well !! Even the plugs on the back of the headstock don't look THAT bad !!
 |
| The small amount of epoxy used hid the extra holes under the finish and repro decal |
 |
| There they are ! And a set of reissue Kluson tuners |
Had to "pose" the completed guitar in an original early 60's brown Fender case !!