
I have always had a special affection for Danelectro's - having grown up in Monmouth County along the Jersey Shore, right where Danelectro was based throughout the 1950s and 60s. The company was part of the local lore - seemed like every musician or guitar guy of a certain age had worked in the Dano factory in Neptune, NJ for a summer. Of course by the time I got interested in guitars, around the late 70s, Danelectro had been gone for over a decade and Kramer guitars had actually taken up residence in the old Neptune Danelectro factory.
I didn't buy my first Danelectro until I was in college, because they were actually pretty expensive due to their legendary status in the Jersey and New York City area. I also had my eye on a Dano Longhorn bass - because I'd seen pictures of John Entwistle playing one - and those were among the rarest of the Danos. When I was in high school you could pick up a 60s Fender Precision for the same price as a Longhorn bass .. and both were out of my range. The first Dano I got was a copper Shorthorn guitar (Model 3012) that was missing a few tuner parts and the aluminum nut - and I paid $80 for. My buddy Dave picked up a horribly refinished amp-in-case model (Model 1448) for $40 - no case and no tuners. At the time we both felt we overpaid by a bit ...
Since then - really beginning about 18 years ago - I have managed to slowly but surely build up a collection of roughly 15 Danelectro guitars and basses - some labeled as Silvertones - and I have really come to appreciate what simple and reliable instruments they are. I have NEVER had a bad Danelectro neck - no twist and always flat - and all the frets in securely. Can't say that for Fenders and Gibsons that have passed through my hands.
I also have fully restored and refinished a few Danelectros - a six-string shorthorn bass, a doubleneck bass and guitar (Model 3923), a 12-string Bellzouki (Model 7010), another amp-in-case Silvertone - and scratchbuilt a fuchsia sparkle, maple board Longhorn bass. Through my restoration work, I have found how to match the metallic copper color used on many Danos, how to replicate the white edging (vinyl wallpaper), how to replace a caved-in top (masonite board from Home Depot) and of course, how to cut those little aluminum nuts from standard barstock aluminum I bought at Ace Hardware!

The instrument that this post describes is a Model 3412 Shorthorn bass, which has a body nearly identical to the Model 3012 guitar, but with the bridge repositioned towards the back edge to accomodate a 30 inch scale length on a very compact body. The bass neck is also identical in dimensions to the guitar neck, but with 15 fret fingerboard and only 4 tuner holes drilled in the headstock. If you examine the picture above, you can see that the only real difference between the shorthorn bass and guitar is the fingerboard, the positioning of the bridge and the tuners - making it very easy and economical to mass produce the two instruments. The 6-string bass Shorthorn simply is the 4 string bass fitted with a 6-string guitar bridge and drilled for six guitar tuners. VERY efficient !!
This particular bass was purchased at a lawn sale quite a few years ago but the owner finally decided he wanted to have it restored to its original finish. The bass was in decent shape, but the body had been refinished with some sorta of thick bumpy finish in a dark tan, vaguely metallic color. The only parts missing were the two distinctive plastic control knobs (someone should make reproductions of them !) and the original plastic strap-buttons.

This Model 3412 was a later example (these basses were made from 1958 until 1968), with the "seal guard" replacing the earlier small plexiglass and vinyl guard - and with a tilt adjustment on the rear of the neck pocket. The tilt adjustment is a threaded mount for a small allen head screw that pushes on the heel of the neck to adjust the neck angle once the two neck mounting screws are loosened up. The allen head is accessible through the back of the body - and can be seen in the picture below.
This bass needed to have the neck angle increased (allen screw driven inwards to push on heel of neck) to raise the string height at the bridge, so that the bridge could be set at the proper height and angle to lock the string ends into the bridge string slots AND to make sure that there was good downforce from the strings on the rosewood bridge saddle. This is a key part of setting up any Danelectro bass or guitar for best playability and tone.

Most of the copper finish had worn off the back of the neck from playing - and the setup was much less than optimal - with the action way too high.

Most of the original headstock decal was intact but some areas of the headstock were "touched up" with the brown paint unfortunately.
I began with the body - working on cleaning the edging material, which appeared to not only be dirty but also to have maybe picked up some overspray from when the bass was repainted. Since the material is a pretty tough vinyl, I simply used a stiff dishwashing brush and some soap and water to scrub the edges clean.
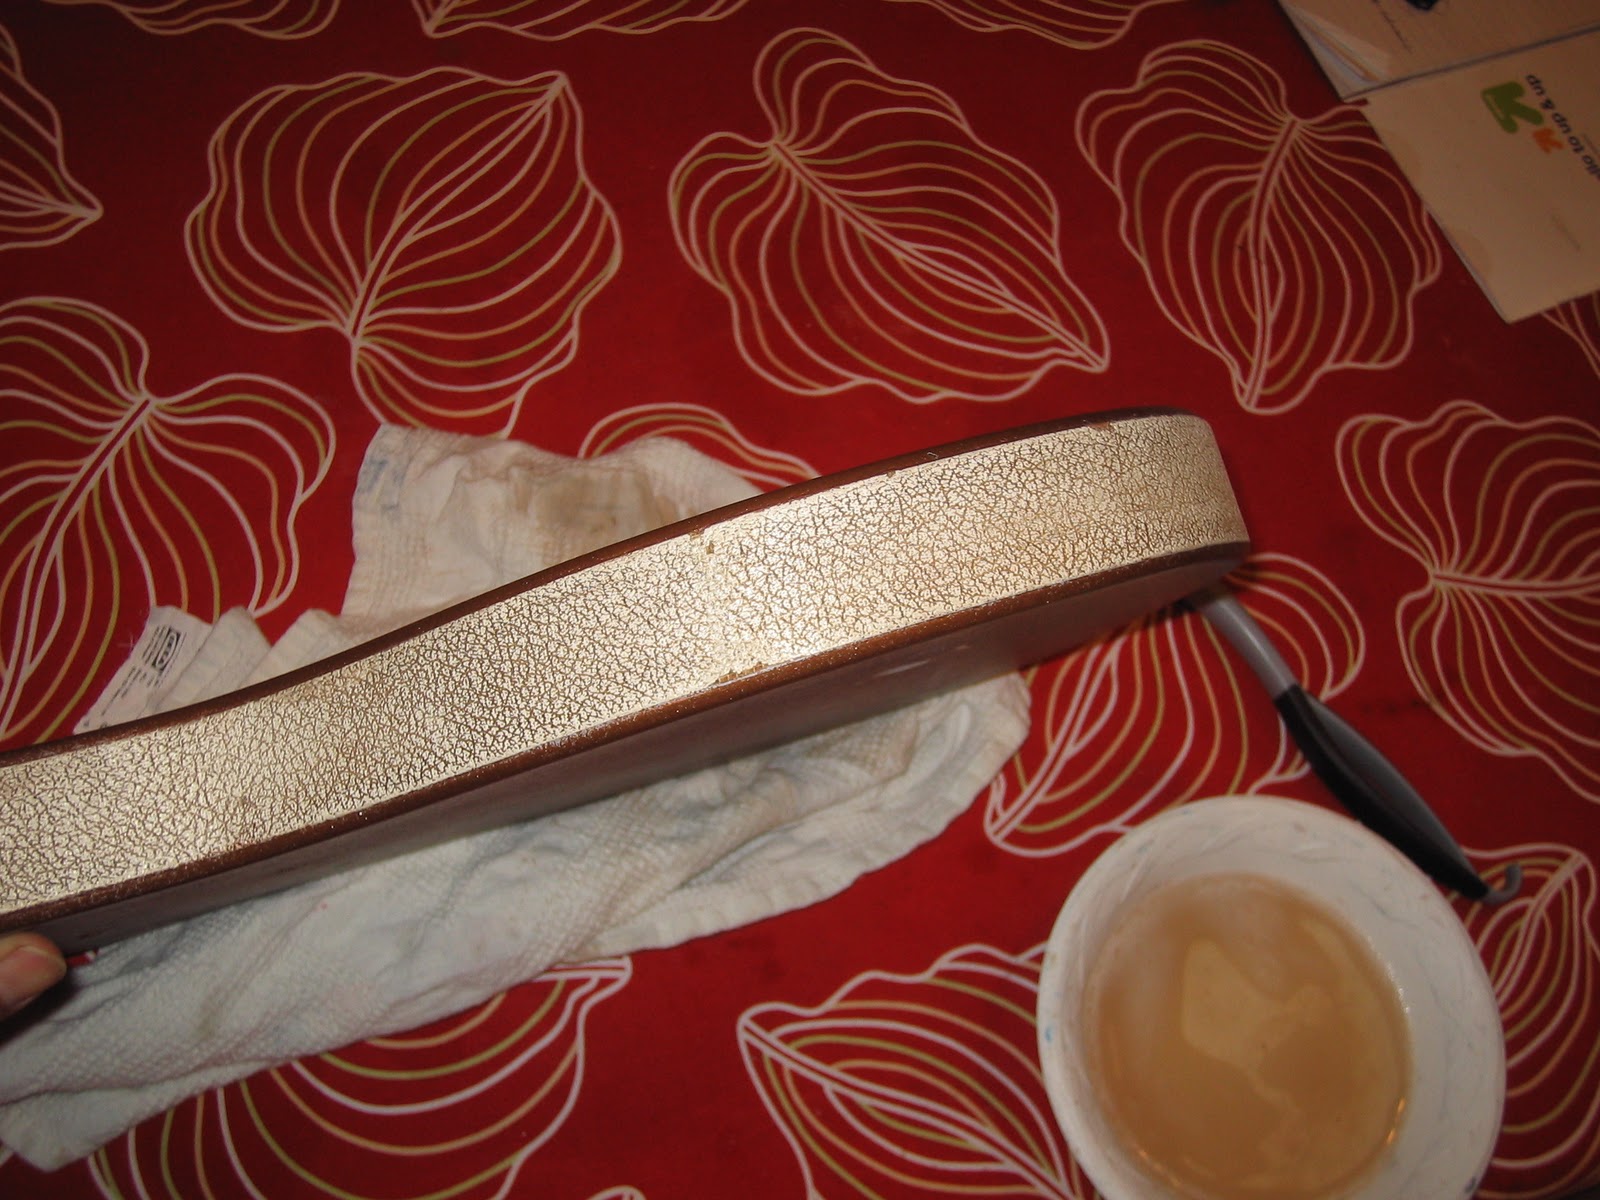


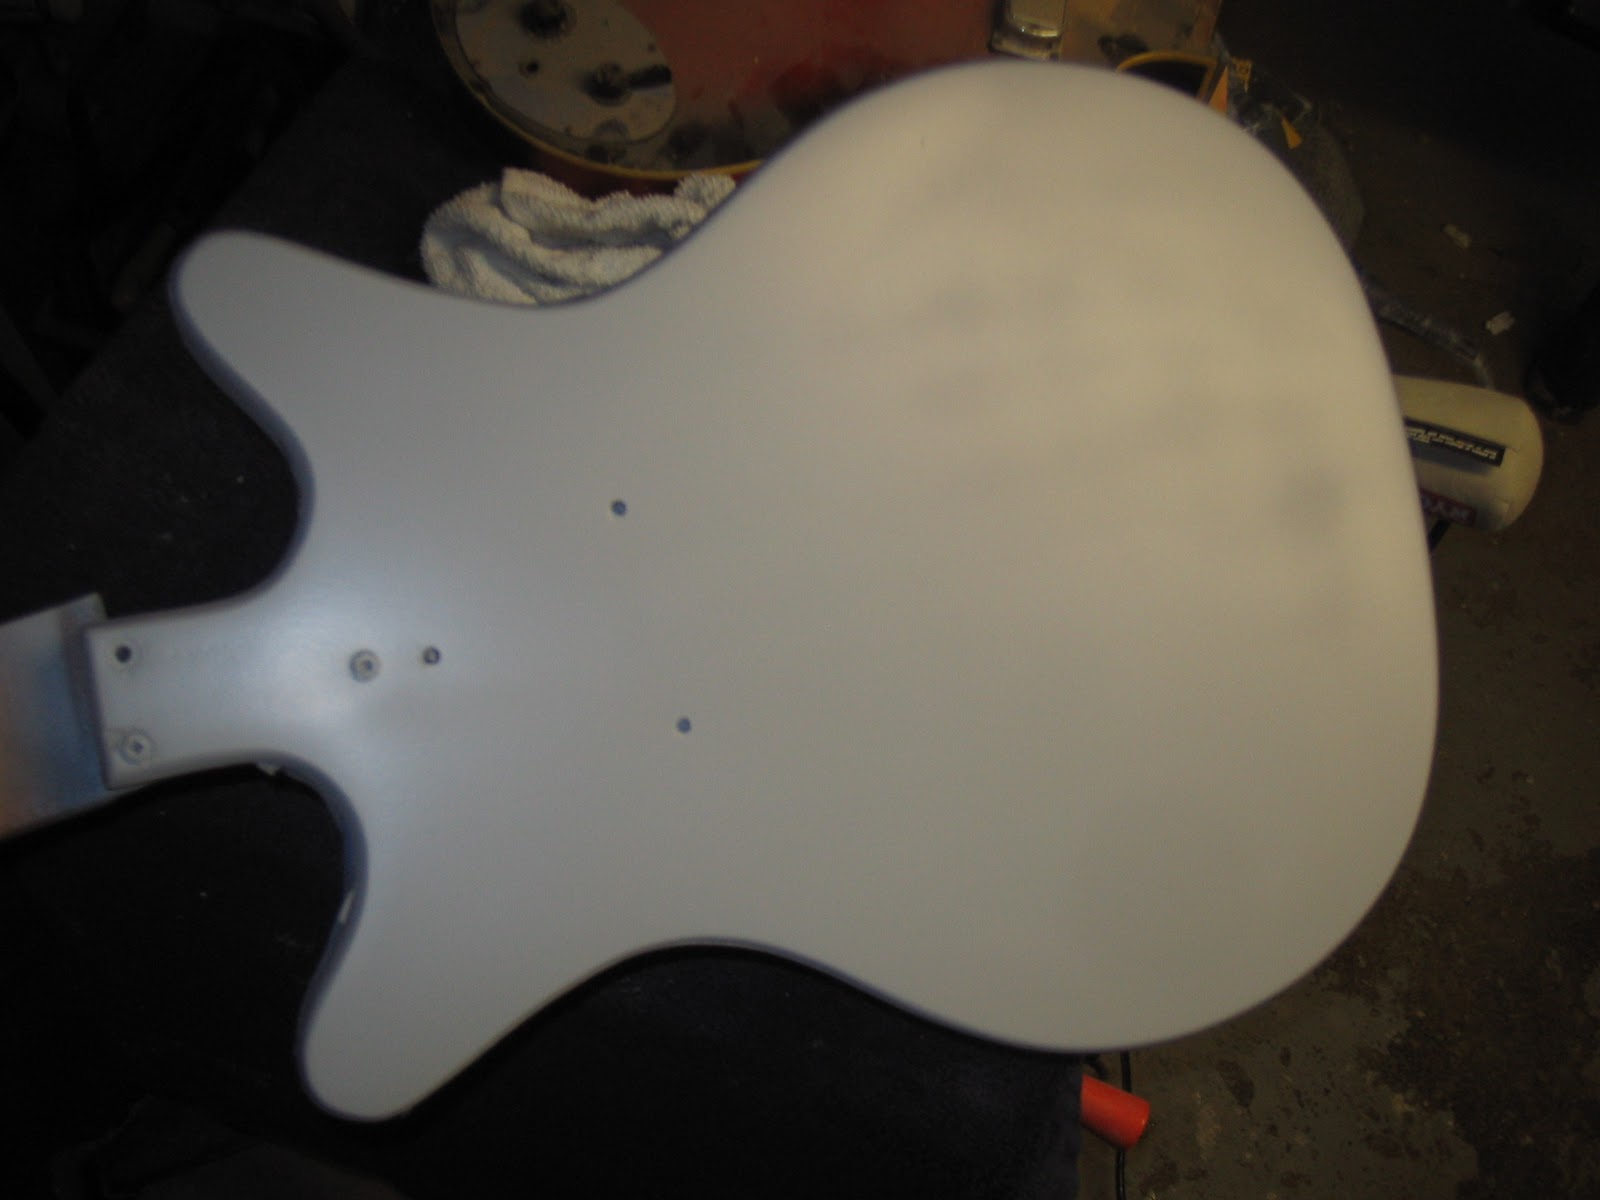
Came out pretty clean !! After this I masked off the edges to protect the vinyl, and then sanded the front and back surfaces of the body using a random orbital sander.


As you can see, the back of the body wasn't completely flat - I think there was some very slight bowing from years of pull from the strings. Most Danelectros are basically hollow-bodies - with a pine frame forming the edge and neck pocket with a masonite front and back glued on. The picture below illustrates the construction of a typical 60s Danelectro. Often there was a separate "bridge block" as well. Note that the piece of cardboard in the pickup area is simply a label for the photo.

Once the body was sanded smooth, it was primed in light grey color (white primer with a touch of black added), which is what Danelectro typically used, though I think I have also seen examples with white primer showing.

The next task was to figure out a pigment mix for the copper-bronze color that Danelectro used on many of their instruments. The pigment was obviously copper-based - probably as a bronze powder - the greening on the worn back of the neck is from oxidation of the copper in the finish.

Prior refins I had done had been more of an "orangey" copper than I wanted - so I decided I'd blend in some other powdered metal pigments into the same copper base I'd used in the past to try to get a closer match to the original color. I decided to match the color that was on the heel of the neck, as the lacquer had oxidized the least there.
After a bit of trial and error, I settled on a mix of the following metallic powders: Pearl-Ex Super Copper, Pearl-Ex Super Bronze and a small amount of Super-Brite Aluminum to lighten the overall color. I compared the test panel to my other Danelectros .. both with and without a slightly tinted clear coat. It appeared that the Danos had a clear coat on the neck but not necessarily on the body - meaning that sometimes the necks appear a bit darker with age than the bodies.
The test panel below has a tinted clear coat on the left hand side.

The body was given several coats of the copper bronze color and then clear coated with a slightly tinted clearcoat to get the slightly duller color of a vintage Danelectro. The neck was painted at the same time and given more topcoats to achieve a slightly more tinted look and assure a smooth surface on the poplar wood. Note that in both cases there was NO wet sanding of the color coats - metallic colors do not respond well to sanding in general, with the metallic pigment particles showing a scratched or brushed look afterwards. Just something to keep in mind when doing metallic colors !!

After color coating and clear coating the body and neck, I put the instrument aside for a week or so to cure. When I looked at the parts again, I saw areas where the finish or the primer appeared to have shrinkage lines or cracks. These lines had not been apparent in the primer nor color coats initially, and I was pretty mystified by their appearance, especially since I had refinished several Danelectros in the past and never had a similar problem.
I consulted with Jim Mouradian and he speculated that maybe the glue in the masonite board had reacted with the finish in places where I had sanded down the body more. The other possibility is that the remnants of the metallic tan "refin" had reacted with the nitrocellulose. I'm not sure still, but in order to prevent this from happening in the future, I will probably give Danelectros more time between the primer coat and color coats, to make sure that I am painting onto a stable finish base.


My fix was to simply wait for several weeks for the finish to cure some more - and then to wet sand the front and back - and apply a small amount of Bondo scratch filler to the cracks that didn't sand out - before respraying the front and back in copper again. This time the finish remained stable and there were no cracks.
Note that I did spray the edge "bevel" of the masonite, as it was already painted the "tan" color and had a few edge dings that were filled and would have shown. Factory finishes generally had some slight overspray onto the bevel, but it was not fully painted.


As mentioned above, the original logo was on the headstock, but the headstock finish was chipped and worn and then owner wanted to make it look as "factory" as the rest of the instrument. I decided to attempt masking the original logo and just refinish around it. Note that the original logos are either silk screened or sprayed onto the headstock using a template or screen. Sometimes its obvious because there are light or bare spots around the bottom of the logo.

Here I have masked off the logo carefully along the silver outline box.

Despite the color being a very good match near the heel of the neck (see picture below) - the color just didn't match well on the headstock face. I could have gotten closer with some tinting of the overcoat, but in my judgement it was still going to be off and look strange in the end.


In the picture above of the heel, the area closest to the butt of the neck is the original finish, with the new finish starting about half way along the heel - a pretty good match.
Visible is the date code - first two digits represent the week of the year, last number is the last digit of the year (the third digit's meaning is unknown)" - 11th week (March) of 1965. Note also the rounded metal insert on the heel of the neck - this is the surface that the neck tilt adjustment allen head screw pressed on.

Here are a few detailed pictures of the tuners - which are a variation of the "skate key" tuners that Danelectro first used on the Model 1448 amp-in-case Silvertone, but then later used on various shorthorn guitars and basses.
As you can see - the boxy tuners consist of a two piece elongated box, that hold the tuner buttons in place, with the tuner shafts and gears mounted to one side of the box. There are two square nylon inserts, one at each end, to seal up and align the two halves of the box - which are also held together by the three mounting screws that go through the tuner body and into the back of the headstock.
I'm not sure if Danelectro made these tuners themselves, using sourced gears, pegs and buttons, or if they sourced them from some manufacturer. I have never seen them used on anything but Danelectro produced instruments. The come in two peg (for 2 X 2), three peg (for 3 X 3) and six peg (for six inline) configurations.


An interesting note is that unlike almost all electric guitars and basses, Danelectros don't have a ground wire running from the bridge to the electronics. The Danelectros rely instead on what was advertised as "Total Shielding" - the "totally shielded" electronics of Danelectro comprised of a box of copper and paper shielding material, taped together to surround the controls. The pickup itself was shielded by the trademark lipstick cover. This approach does work fairly well, though I have added a bridge ground wire on a few Danelectros to further reduce any electronic buzz.


Finally - the bass was completely assembled, though still missing two control knobs - and it not only looked great but also played and sounded great, just like most Danos !!


My next Dano project will be a 12-string Bellzouki that is currently repainted Foam Green and missing its vinyl trim and other details.


0 comments: