So anyway - the truss rod on this bass apparently broken at the anchor - meaning that I had to get TO the anchor to put in a new anchor and thread in a new truss-rod. In most cases with Fenders, the truss rod simply becomes unthreaded from the anchor - Fender never thought of a little spot weld to old it all together - and I have - once - succesfully re-threaded a truss rod into the anchor with loctite on the threads (I have a weird little tool I made to let me hold the truss rod and thread it in from the bottom of the neck). But in the case of a broken rod or anchor - or simply to be sure the rod is securely anchored - its best to have direct access to the truss rod anchor.
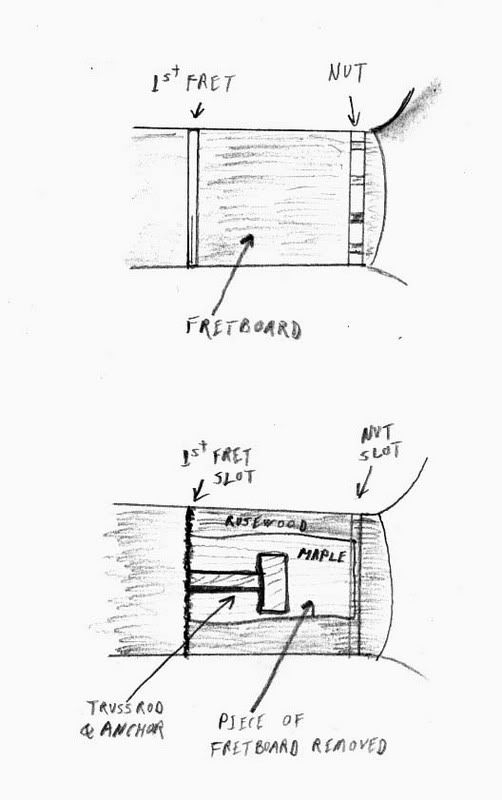
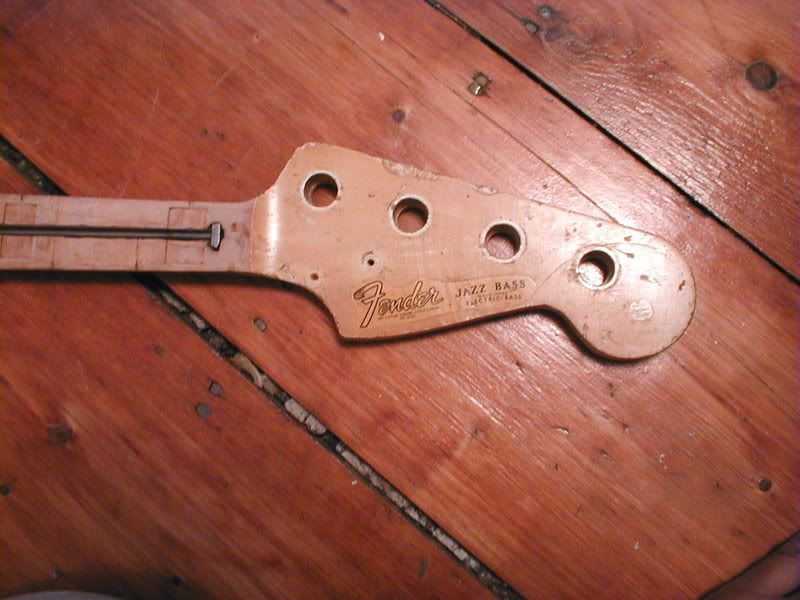
The diagram below is what I sent the owner of the neck - proposing my repair. The other picture is a 66 Jazz neck project - someone cleverly peeled off the fretboard !! Someday I'll fix it - its an original Olympic White headstock.
So I received the neck - which had been heavily played over the years and was missing the headstock decal and one clay dot. I decided to replace the clay dot with a small amount of cellulose filler that matched the color - which I fine sanded smooth with the surrounding fretboard, and then soaked with "thin" HotStuff glue before sanding it again. After a little scratch polish and lemon oil on the surrounding fretboard, the dot looked identical to the others on the neck !
But onto the truss-rod repair. I first removed the string nut and 1st fret. Then I made two longitudinal cuts from the fret slot to the nut slot - repeating until I had hit the underlying maple and trying to follow the grain lines in the rosewood. I used a Dremel tool with a thin cutting wheel to cut down vertically at the first fret slot and the nut slot. Then using a chisel that was just a little narrower than the piece of the fretboard I was removing, I carefully got under the edge of the board at the nut slot - and peeled up the rectangular piece of the fretboard.
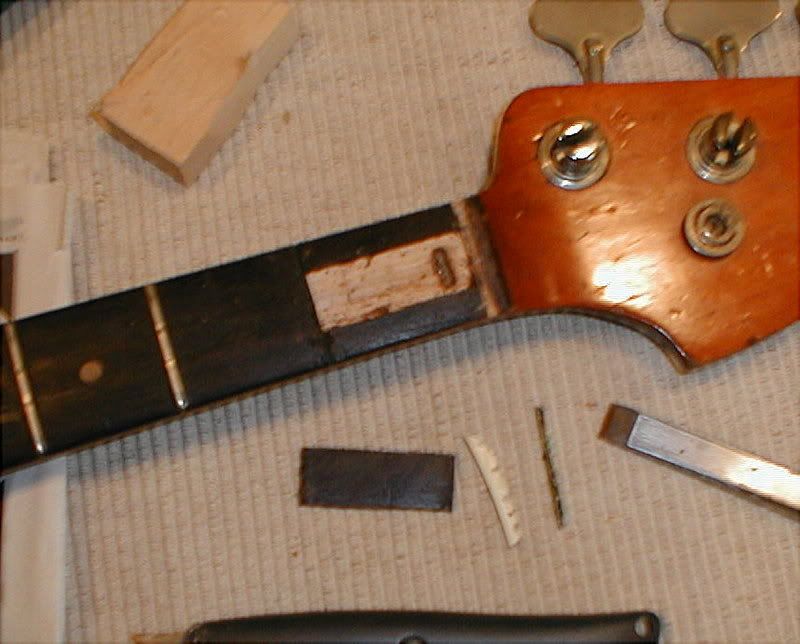
I then removed some of the maple to allow access to the anchor and truss rod slot. I placed a new Stew-mac anchor into the neck, using small pieces of maple and glue to tightly lodge it - and then threaded the new truss rod in from the base of the neck. When the threaded ends were near the anchor, I placed loctite on the threads and then used my homemade tool (I need to take a picture of it!) to twist the truss rod from the base of the neck and thread it tightly into the anchor.
After allowing the loctite to set for several hours - and testing the rods secureness - I fitted a narrow piece of maple over the slot for the rod so that it wouldnt rattle in the neck. One step I did not do - which has been recommended to me by Jim Mouradian since then - was to wrap the truss rod in either electrical tape or very thing wire-shrink wrap so there wouldn't be any chance of the trussrod rattling in the neck. The challenge can be in threading the truss rod into the neck though once its wrapped, since its a very tight fit. I will say that I tried this neck out on a bass after the repair and I didnt notice any rattle - not too surprising since it was under tension too.
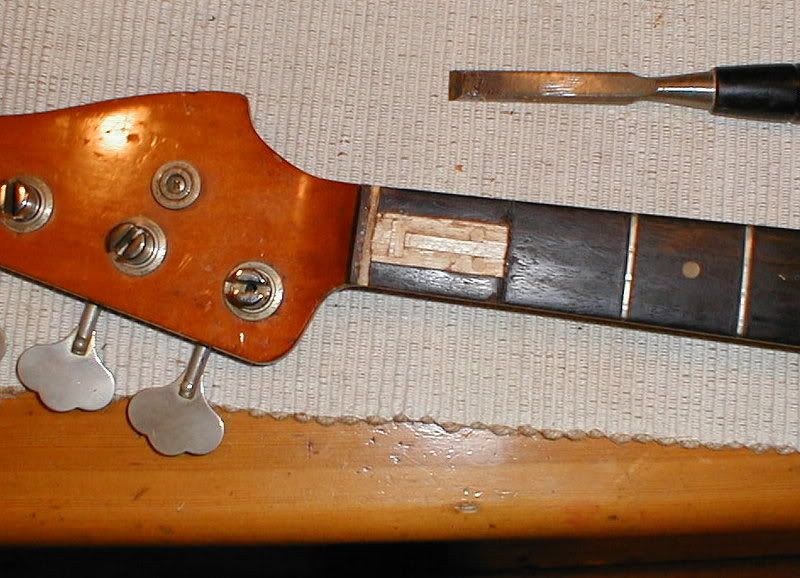
Now came the task of putting all the pieces back in place - the replacement pieces of maple were filed down to match the contour of the piece of fretboard that was removed - and then the piece of fretboard was glued back in place.
Once the glue was dry, a combination of rosewood dust and crazy glue was used to fill the slots left by cutting the fretboard. A razor blade was used to sift some rosewood dust into the slots - piled up above the surface of the fretboard - and then crazy glue was run along the slot. I sprayed an accelerator on the glue, so that the dust and glue combination instantly hardened, as you see in the picture below.
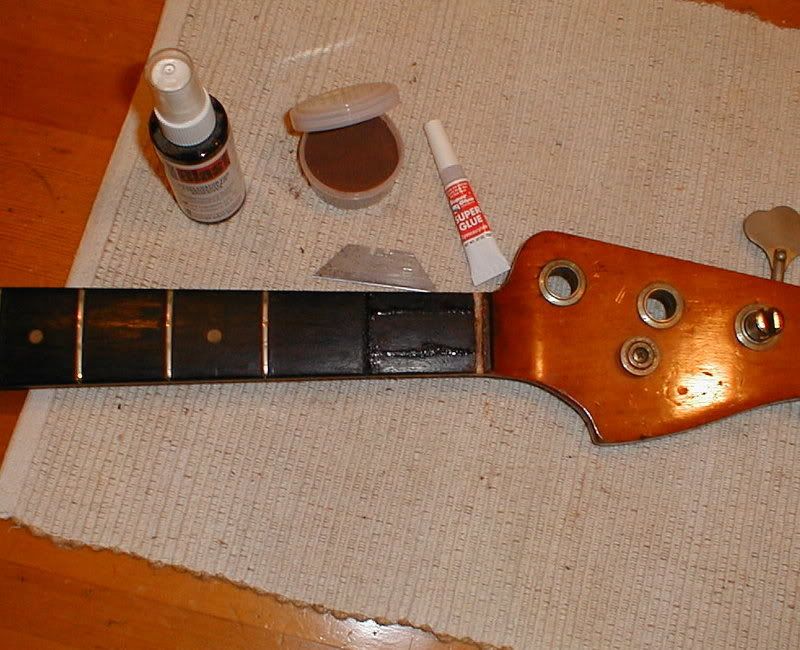
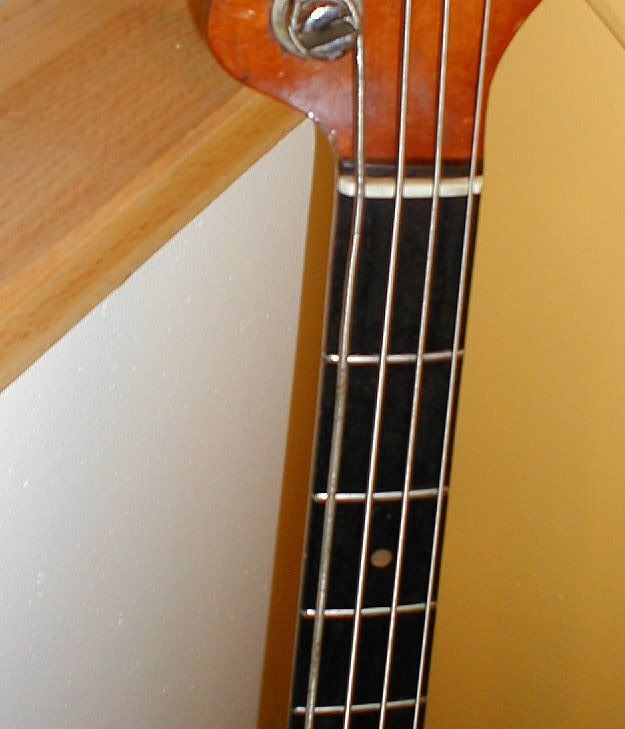
Once everything was hardened - the two ridges were carefully filed down flush with the board - then the entire area was gently sanded smooth - scratch polish and lemon oil applied - and the 1st fret and nut were reinstalled. Once the neck was strung up, the repair was not obvious at all - you could see the lines if you were looking for them, but the strings prevented them from being prominent.
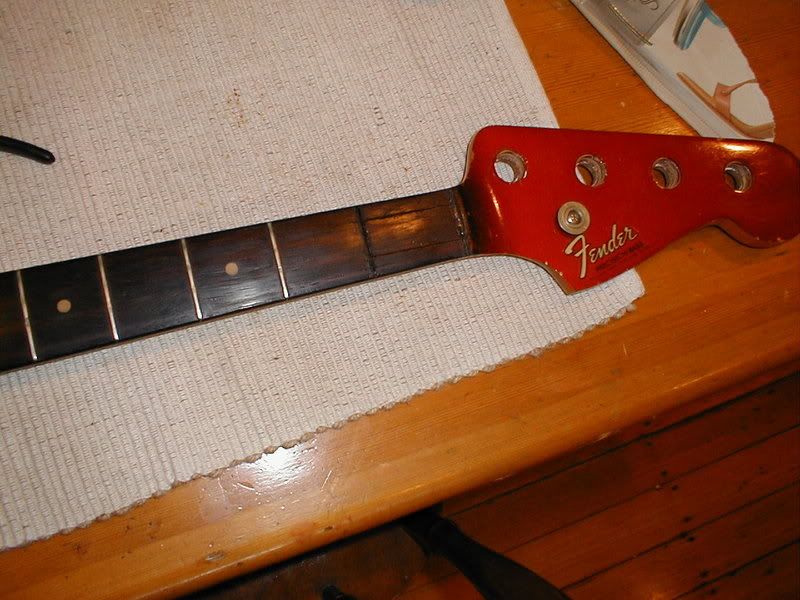
Most important - the trussrod now functioned perfectly - I swapped out the neck from my 66 Jazz bass to try it out - and the neck played flat and evenly - no relief and no twist. Oh - and heres the CAR neck that I got in the deal - and it needs the same treatment PLUS a heel repair for some brutal chiseling that was done in some misguided attempt to "fix" a truss rod that broke at the adjuster.


Sorry, what happens if the truss rod bolt is at the nut.
ReplyDeleteIf the truss rod is of the more traditional Gibson type or Fender 70s type, then there are a few options.
ReplyDeleteWith a Gibson SG, I was able to do almost the same process as you see here, except that I pulled the last two frets near the heel of the neck to access the anchor. Did the same thing to then but the same piece of rosewood back and it was very hard to see the repair.
I have never done a 70s Fender with the bullet truss rod adjustment at the nut, but the fact that its a bolt-on neck would give you a second option - that is the get to the anchor from the back of the neck if the neck has a "skunkstripe". The skunkstripe is how the truss rod was installed at the factory, so makes sense to repair it that way as well. You could replace the entire skunk stripe (its walnut I believe) but I'd just take a little piece off the end and patch it.
I am very curious as to the tool you devised to rethread a truss rod to the anchor nut from the bottom of the neck. Could you please describe it or post a photo? I have a 62 reissue tele that needs adjustment every 3 days or so as the neck once straightened, always eventually returns to having too much relief. I suspect it is unscrewing itself from the anchor.
ReplyDeleteThanks for the post.
Hi Chris - I will take some pics of the tool I made and add as an update to this post.
ReplyDeleteOn your Tele - is the truss rod nut bottomed out against the rod ? this happens on older Fenders, necessitating the removal of the adjustment nut, and installation of a shim around the truss rod to make up for the neck wood getting compressed.
If your truss rod is bottomed out, you might unthread the rod from the anchor when you LOOSEN the truss rod nut, IF the rod turns with the nut (if they are frozen together). But if you are turning the adjustment nut clockwise, there should be no way you are loosening the rod from the anchor (it's threaded IN clockwise too).
Hi Krishna- I am not sure if the truss rod nut is bottomed out or not, It's hard to see without taking off the neck. From what I can see it looks quite close at least. I have been waiting to see how much relief returns before I take off the neck after my last adjustment. The guitar is only 2 years old and was bought 1 year ago. I'm thinking that although I am tightening the rod, it is untightening at the anchor hence slowly unthreading itself. It has only moved a little from my last adjustment which was about 4 days ago. Is it possible that it still needs to settle?
ReplyDeleteI have adjusted it about 6 times by now and each time it has slipped back to having too much relief. I have never experienced this in all my years of setting up my own guitars. If it moves a little more this time I will try and see if the nut and rod are frozen together or not.
I'm wondering that if it is, then perhaps could an impact wrench free it without moving the truss rod too much you think?
Sincerely
Chris
Hi Chris - email me directly at: krishna@guitargarage.net. I think its more likely that the anchor is simply spinning or stripped - the resistance you may be feeling is simply the truss rod spinning in the neck.
ReplyDeleteEmail me and we can have a more detailed discussion!
Very good post. Thanks a lot for sharing it. It was really fun to watch those two have it out like that.austin texas auto repair
ReplyDeleteThanks for the info. My Truss Rod Stripped at the socket end while using a Ball End Fender adjustment tool. I'd taken the neck off to adjust the Fret to String Dead spot on the A & D strings from about fret 18 toward the pickups. I thought the Truss Rod had moved through that adjustment. Any I'm ready to take it to the shop and let a pro do it!
ReplyDeleteLast night I tryed to adjust the truss rod of my 1971 Fender Jazz Bass. The neck was a bit bent to my taste... But the screw was so hard to turn, that the entire screw came out of the neck!!!...
ReplyDeleteI spent the entire morning to fix the problem, and that was not simple. I had to open the neck at the first fret to access the top end of the truss rod, just like you show here! Thanx for the advice!
Everything is back in place now and the adjustment is now very soft and clean.
Pierre - I'm very sorry for my slow reply here ! But your heart must have dropped when that happened !! I'm glad you were able to get everything back together and working. The problem is that the adjustment nuts will corrode and freeze onto the truss rod, so when you attempt to loosen them (by turning them clockwise) - the truss rod unthread sat the anchor. If Fender had taken the simple approach Gibson used - where the "anchor" was simply the truss rod end bent at a 90 degree angle and locked into the wood, there would be so many fewer truss rod problems with Fender necks. I love Fenders, but they are far from perfect!!
DeleteI have a 70s jazz bass the the rod unscrewed from the anchor, i have the skunk stripe removed and have to make a new one, if i use theadlock on it do you think i can get away without removing the anchor? thanks
ReplyDeleteSorry for my very tardy reply - but yes, If the anchor is secure you should definitely be able to just apply loctite to the threads and have it hold in place. If you have the proper size threading die, I would suggest chasing the threads on the end of the truss rod to clean them up first - probably not critical but the cleaner the threads the better and tighter the fit in the anchor.
DeleteAgain - sorry for the slow reply !