All Season Spray Booth


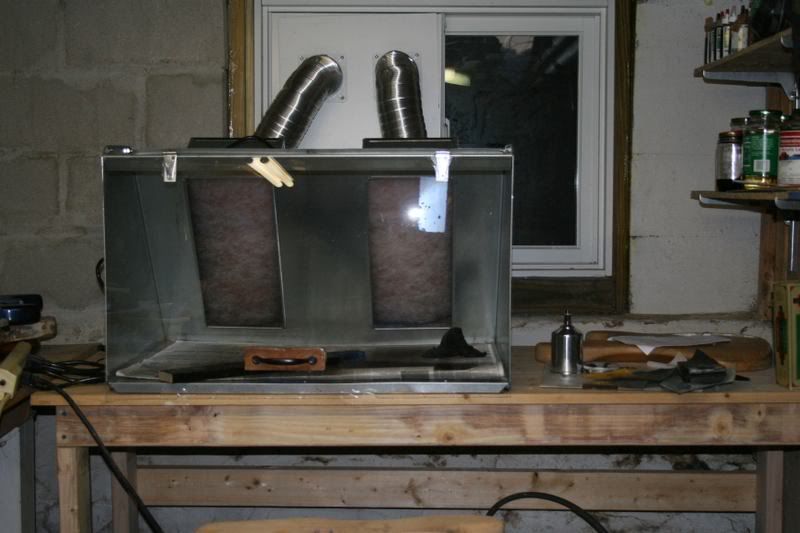
Around November it became obvious that I was going to have to find a way to spray indoors, either by setting up a spray booth in my workshop, or finding a heated space I could use. After shopping around online, I realized that a full size spraybooth was out of my budget for now, but that there were a number of "hobby" spray booths that would at the very least allow me to spray Fender-style bodies or do touch up work or paint headstocks and necks.

I purchased a Paasche 30 inch, dual fan spray booth online, along with a set of devilbiss HVLP spray guns. While the spray booth had fans and a double filtration system built in (one for paint particulates and one for VOC), it was obvious that the booth had to exhaust to the outside and also would need a cover so that sprayed pieces could dry without fumigating my workshop and home.

I was able to use aluminum dryer vents and fittings, connected to a thick masonite plate, to vent the spray booth through one of my basement windows. The plate slides into the window frame when it is opened but can then be reomved so that the window can be sealed up when the spray booth is not in use. The exterior portion of the vents have typical hinged dryer vent doors, to keep out wind and precipitation and squirrels!

I added a front cover made from 1/8th inch plexiglas, hinged so that I could seal off the booth for use as a drying booth. I may add some adjustable stops so that I can keep the door slightly ajar, thereby allowing me to keep one fan running while a guitar body or neck dries inside the booth.

The booth is not big enough to fit an entire guitar within it - but I may modify it this spring to widen it out to something like 60 inches.

0 comments:

Gibson RD Standard Bass - refinish & T-bird-i-fication

A project that perhaps some Gibson purists will frown upon, but the goal is to take somewhat abused Gibson RD bass and give it a bit of a makeover - borrowing the color scheme from 1960's Thunderbirds and hardware from more recent 'birds.

The RD is in good cosmetic shape, however it has suffered a serious decapitation (as opposed to a mild decapitation ? "its only a flesh wound"??) in the past and slightly glue-heavy repair - which nonetheless does appear very solid. I am considering regluing it, but only if there some sign of weakness or the headstock angle is off (doesn't appear to be). The frets also appear to have been leveled with a belt sander or other inappropriately industrial grinding instrument - and are really ground down to nothing in some spots - so the neck will require a complete refret.

OK - "purists" - get ready to cringe.

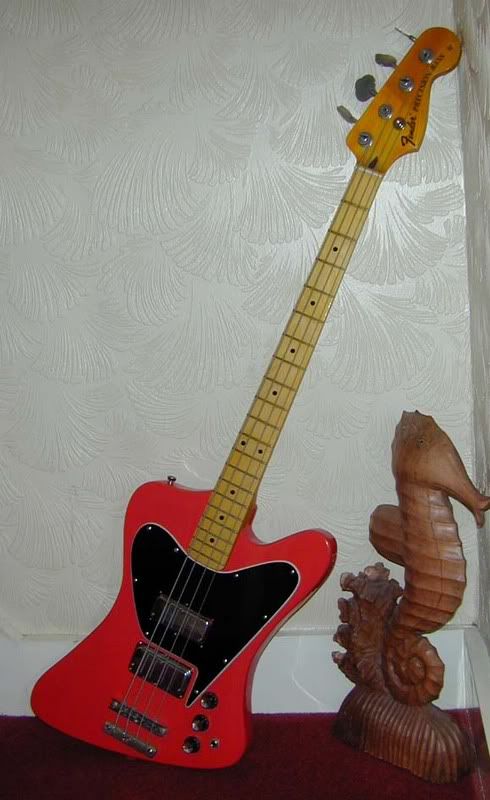
The plan is to defret the neck, make sure the board is level, and refret it. The body will be sanded down - leaving the clear finish as a sealer coat. The body will be routed for a pair of Thunderbird pickups (black), and then the entire instrument, except for the fretboard and face of the headstock, will be painted Ember Red - a little used custom color from Gibson's colorful mid and late 60s. Ember Red is similar to Fender's Fiesta Red, but with a stronger, deeper red tint as opposed to Fender's more salmon tint. I have only seen the color in a few pictures of instruments ( an SG and I want to say a Melodymaker ?), but it was an option available for an additional $25 around 1966. The color is actually a 1958 Edsel color.

A new pickguard will also be cut - we haven't discussed yet whether it should be three-ply white or black - white would look more 60s.

Anyway - feel free to verbally accost me - but I'm doing it regardless !! And .. I will have enough Ember Red left for a few more paint jobs afterward - my '66 NR T-bird is considering getting in line for that .... maybe someone wants their BachBird in Ember Red too ... ????


Might it end up looking a little like this bass ..... which appears to be something like .. Ember Red ...


I have heard that the RD Bass was inspired by Entwistle to some degree - but that he hated what Gibson came up with.


Update - 3/8/2008 Finally Restarting this project !!

I've launched into this project again - and the changes should now start to happen more quickly.

The owner and I have decided to slim down the baseball bat-style neck - not radically, but enough to improve its feel. The neck is very solid, constructed of three pieces of maple, so I'm sure it will remain stiff enough to maintain its straightness.

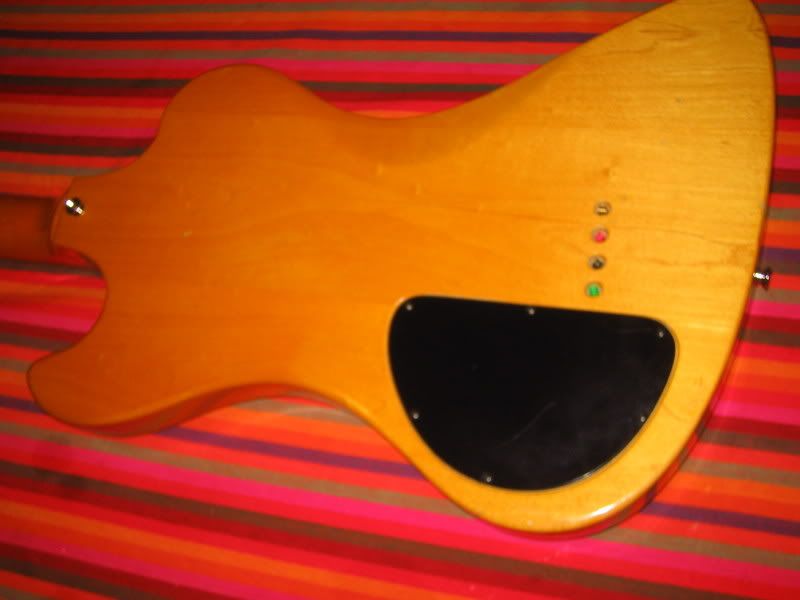
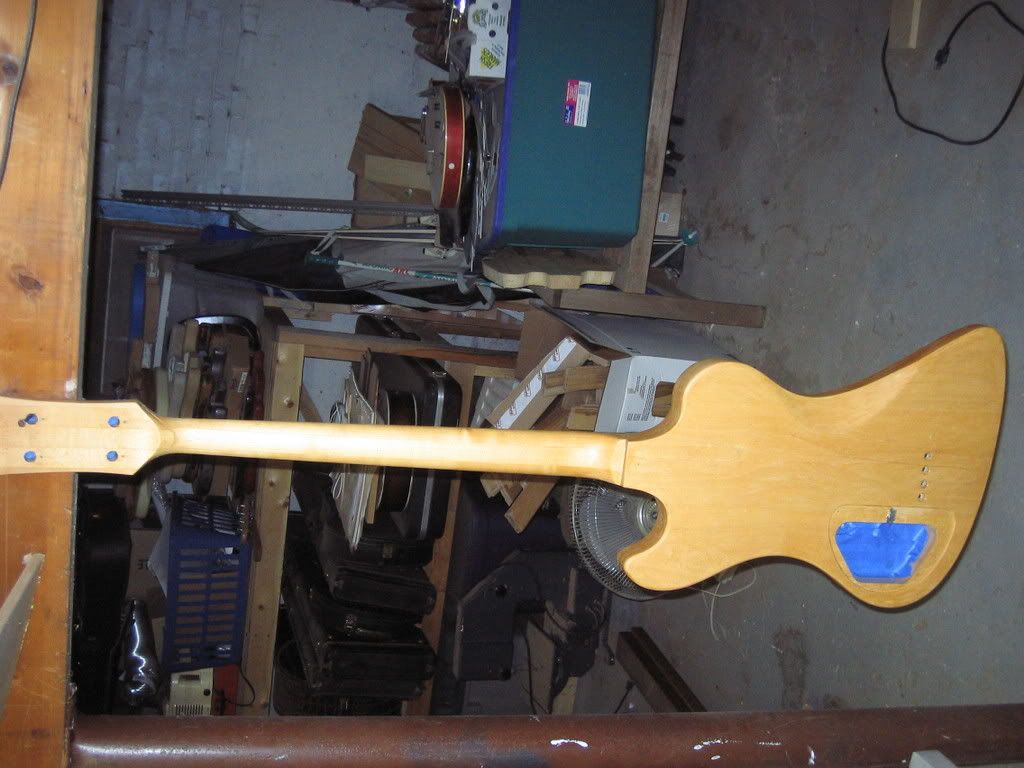
I have completely stripped the bass, with the exception of the front of the headstock - revealing some very pretty pinkish maple underneath. I used a chemical stripper which took the finish off easily - appears to have been nitrocellulose. I haven't sanded any of the bass, except for the fretboard as I re-radiused it to a 16-inch radius from the 7 1/2 inch (fender!!) radius it had. The pale color you see is the natural color of the maple and probably the color of the entire bass once I sand it.


After completing the stripping and sanding, the next step I'll carry out will be to shave the neck - I'll take some measurements along the length of the neck and then set my target measurements at those points to get a nice even taper. And then I will go for it !!


(Update April 5, 2008)
After a bit of a hiatus, the RD Bass project is rolling again. The changes that have been done aren't visually that impressive, but are fairly significant.

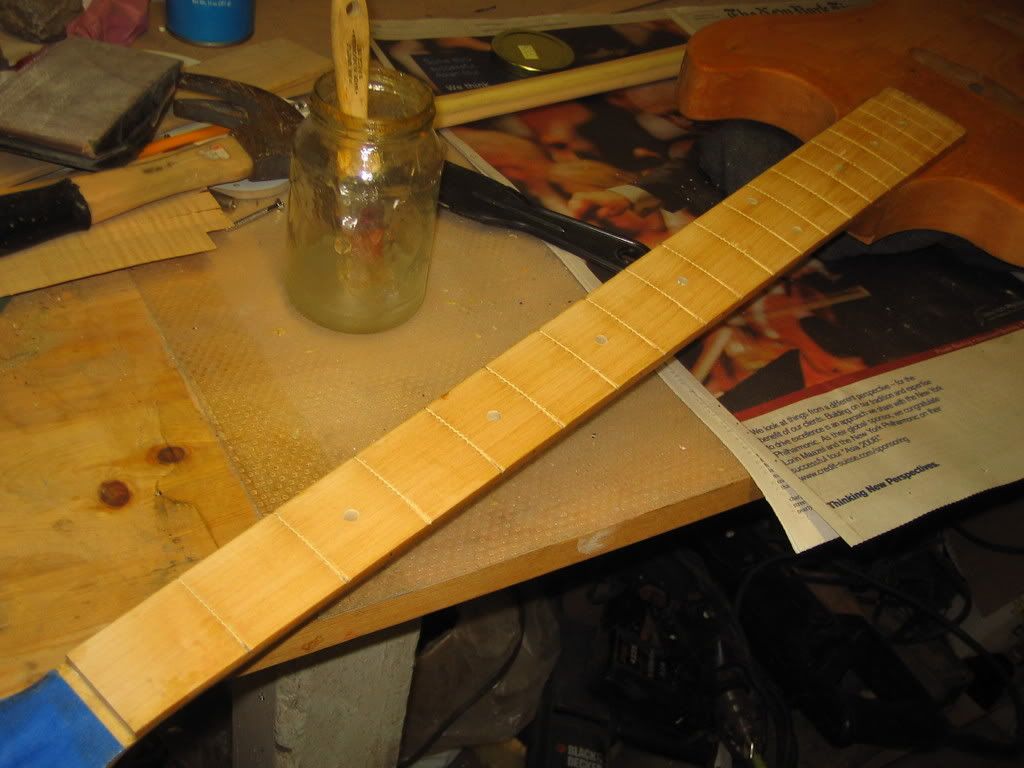
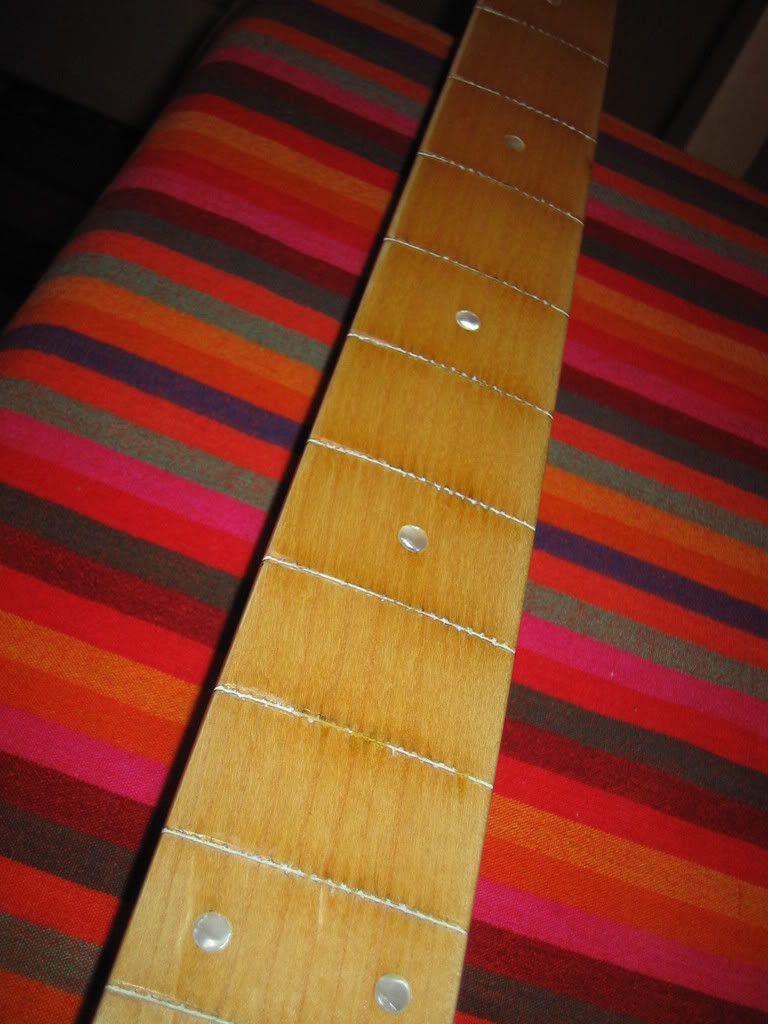
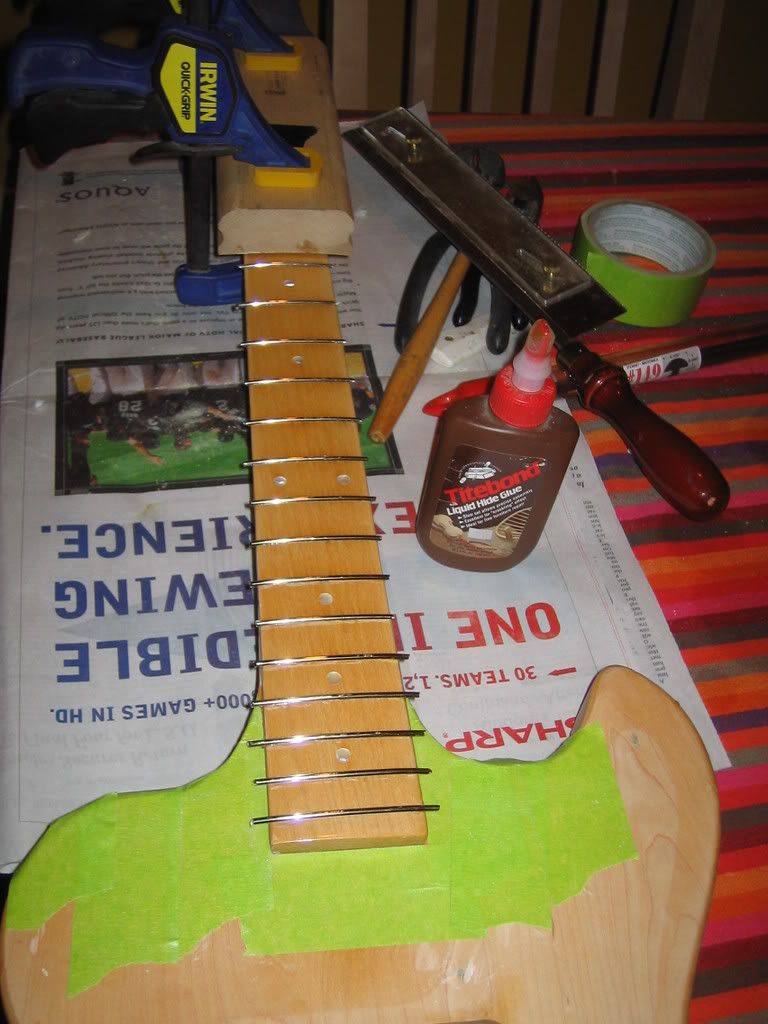
The neck was defretted, then the fretboard radius was flattened to a 16-inch radius from the very Fender 7 1/2 inches it originally was.


Then the back of the neck was shaved to reduce its bulkiness - I limited how much I did as I was afraid of getting too close to the truss rod mid neck, but the neck is a bit less of a baseball bat now. What would really have been nice to do would have been to narrow the neck - keeping the nut the same, but narrowing it down along the length of the fretboard. But I couldn't figure out a reliable way to do this with the neck glued into the body, and ungluing the neck was not something I wanted to tackle.

The maple on the neck is really gorgeous once its all stripped and sanded down - I sprayed the fretboard with several coats of clear nitro and then buffed it out to a nice shine - BEFORE refretting. Once the refret is complete, the rest of the guitar will get a few good clear coats - an wet sanding with 220 and 400 grit paper - and then a white primer coat - ala Fender.


(Update April 14th 2008)

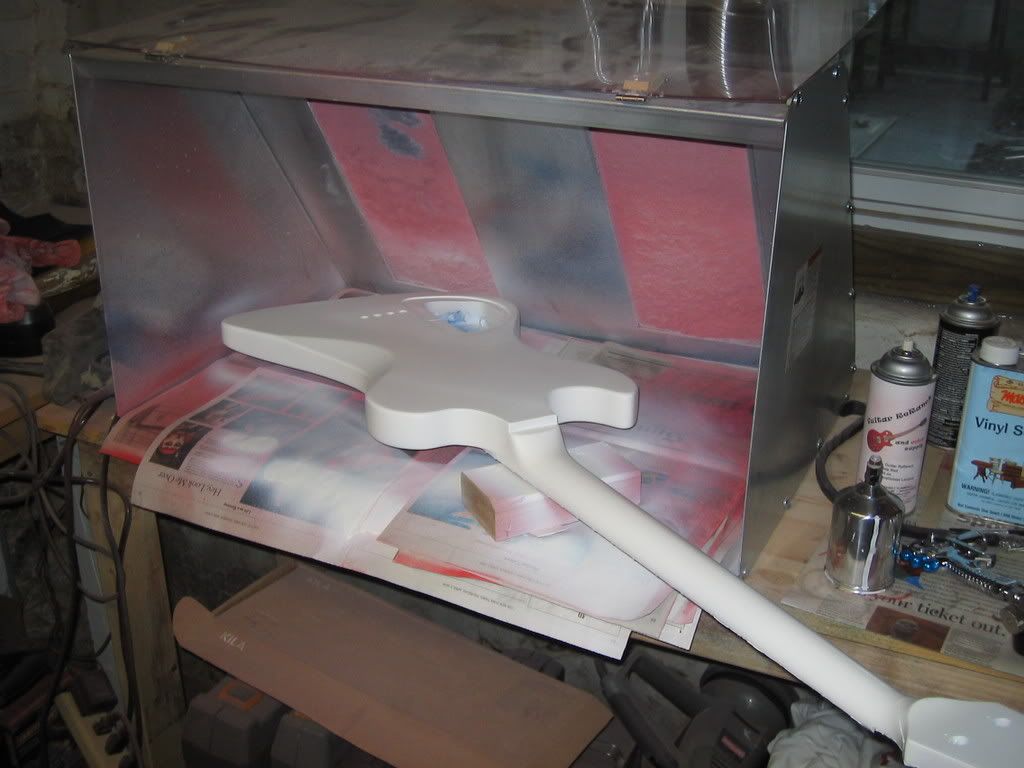
Primer coat is on - some sanding and filling here and there will be required, but the first color coat should go on in a matter of days.


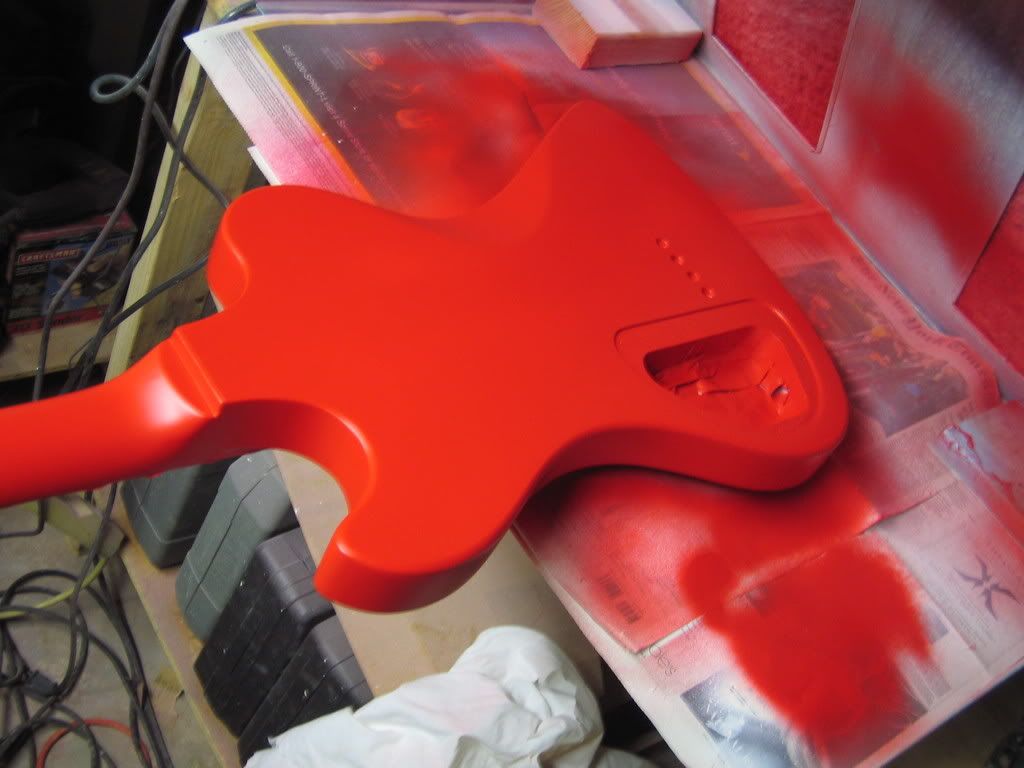
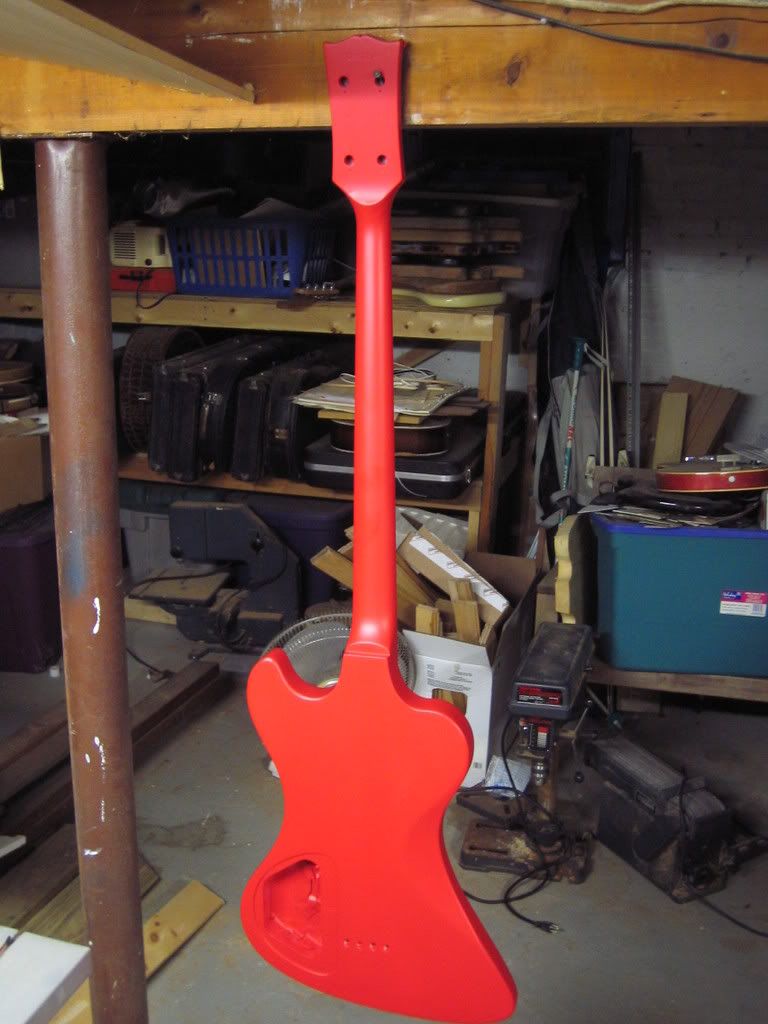
And now we have color - the Ember Red is a pretty intense color - looked VERY orange when I sprayed it, but darkened slightly as it dried and probably will darken slightly more once its clear coated. The paint, which I ordered from TCP Global, and which is actually an acrylic lacquer as opposed to nitrocellulose, went on beautifully with great coverage over the white primer. The pictures below were taken shortly after I sprayed the first color coat. This will be a unique looking RD bass !!


0 comments:

G&L ASAT Bass Refinish

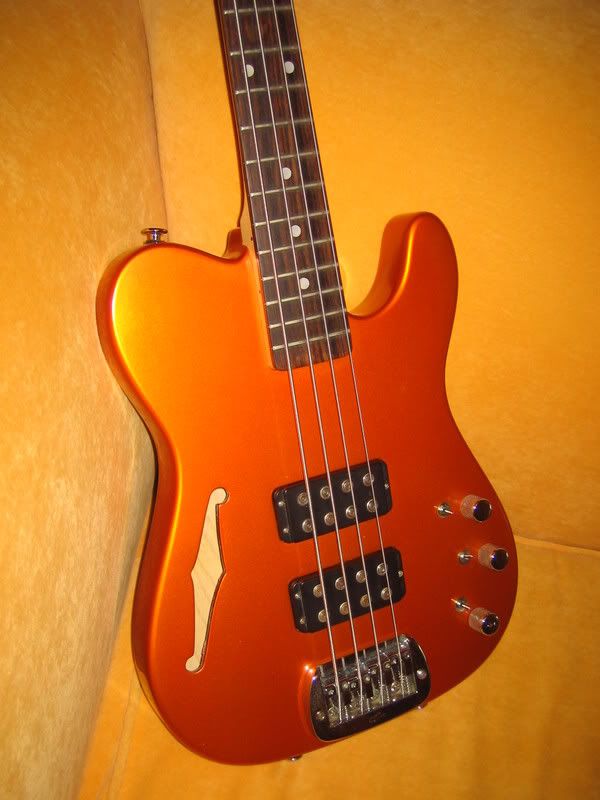
Ok some of you may wince, because this bass had a very nicely done factory cherry sunburst finish when I started on it, but the owner simply didn't like it and wanted something brighter and louder and more ... ORANGE !!!

This is a very cool bass - sort of a Telecaster body, but hollow - used on a full-scale bass. Very lightweight and balanced. May have to shop for one of these - the only G&L I have is a 1983 L-1000, which is built like a tank, but unfortunately weighs as much one too!

This bass was finished with a relatively thin polyurethane finish. The owner and I agreed that I'd leave the majority of the old finish on the bass, and then prime over it, before applying a candy apple orange finish. This is the same as the classic candy apple red finish, which combines a silver or gold metallic undercoat with a transparent red overcoat, except that in this case the overcoat is more like the transparent orange used on a Gretsch 6120.

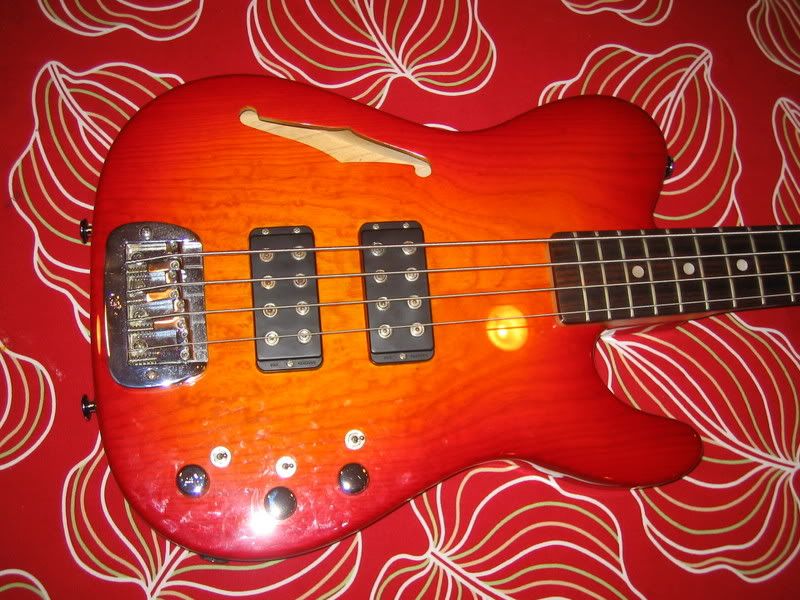
Here is the bass before .. yes yes .. very pretty.


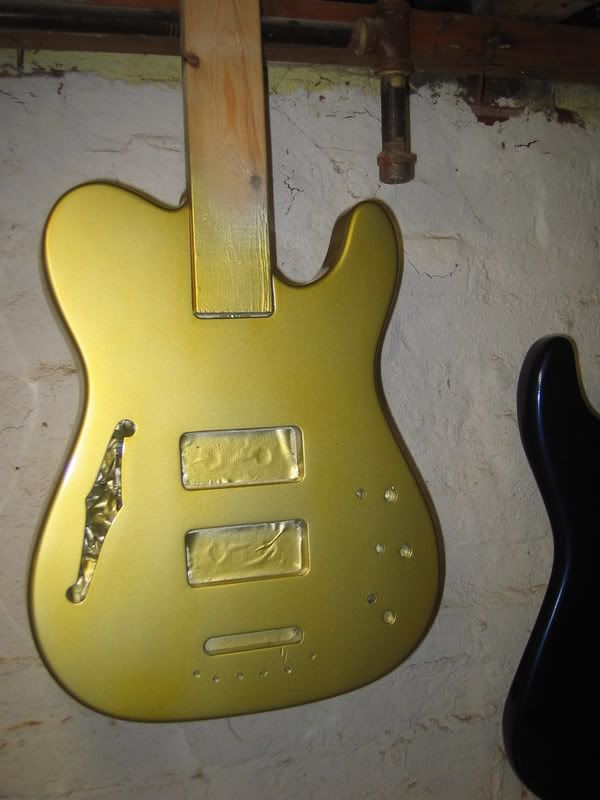
The bass was disassembled and then sanded with a random orbital sander and sanding pad - mostly to rough up the finish enough for primer to adhere well. The bass was sprayed with flat white nitro primer - then wet sanded again before being ready for the silver undercoat.

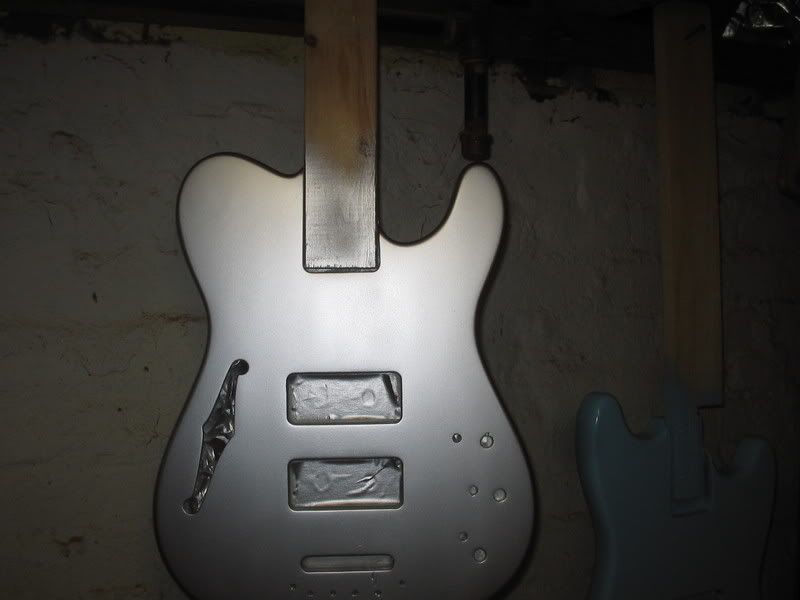
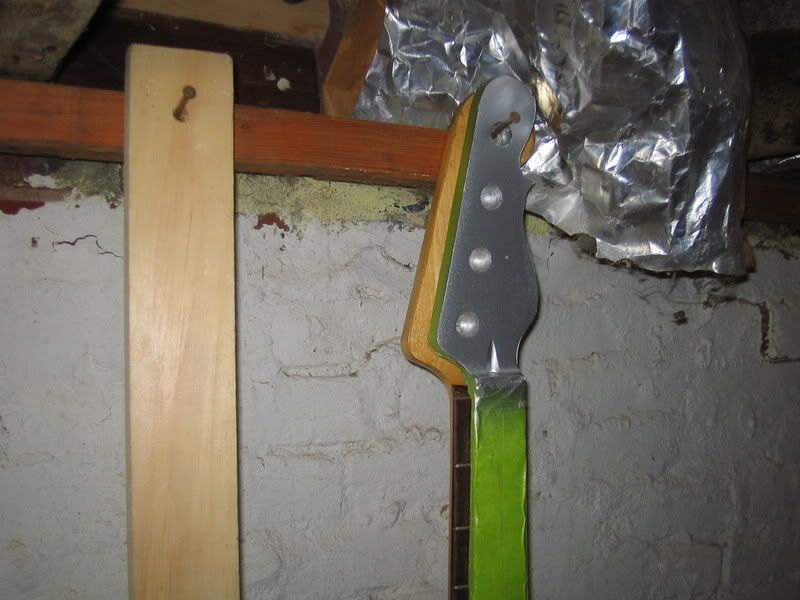
The silver undercoat consists of clear gloss nitro lacquer, with fine "Brilliant Aluminum" powder stirred into it - the powder is tiny flat metal flakes that are suspended in the clear nitro. A similar approach is used to do the classic Gibson "gold top" finish, except powdered bronze flakes are used. The picture below shows the body and headstock after the initial layer of silver undercoat.


Once the silver coat was wetsanded and a second layer applied, the guitar was ready for the tinted "candy" coat.

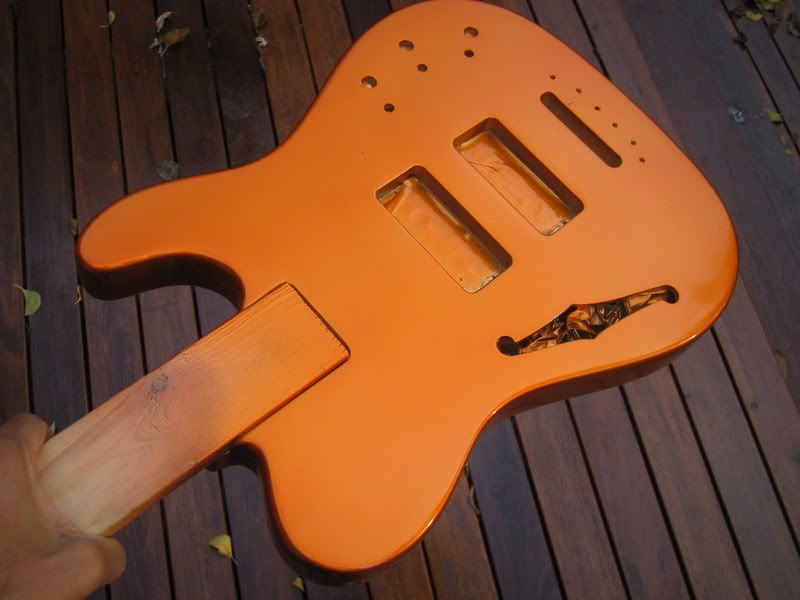
Since its easy to add color, but impossible to take it away once sprayed, I started off with a very lightly tinted mix of clear nitro, lemon yellow dye and cherry red dye, and sprayed several light coats over the guitar. The color wasn't very strong and the guitar took on a distinctly GOLD look !


I decided at this point that maybe there was too much yellow in the mix - or too much green in the lemon yellow - or something just not ORANGE about the color, so I went to Rockler's and bought a bottle of "orange" dye. I mixed this again into clear gloss nitro, and after test spraying a silver painted piece of wood, I started spraying the G&L again. And this time there was no question - this bass was going to be ORANGE!!

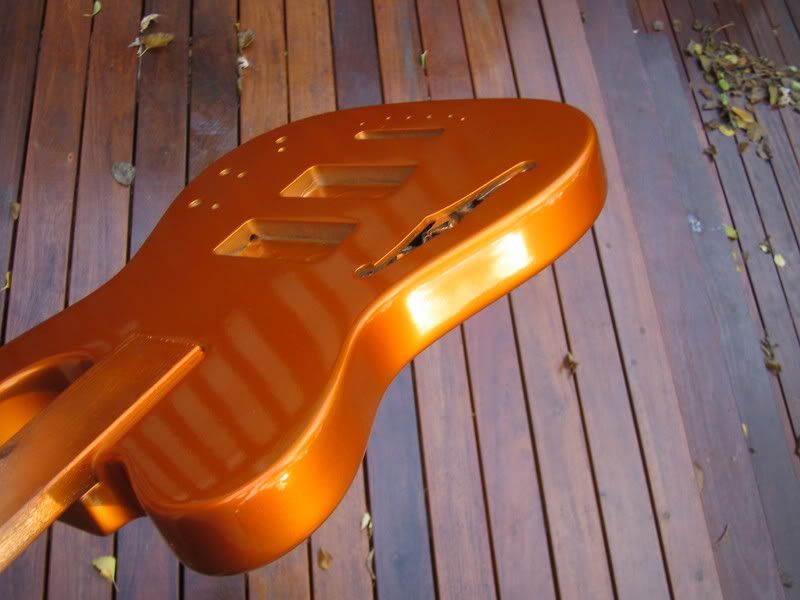
The color is tricky to capture with a flash - the silver undercoat reflects strangely through the topcoat, but the first blurry picture gives a better impression of how orange the bass now is. Better pics will be coming tomorrow.


(Update  11/17/07)

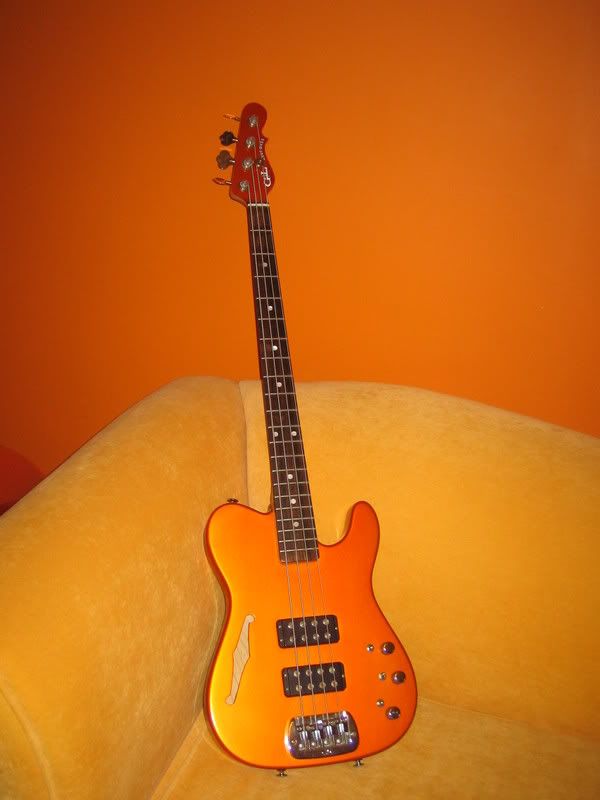
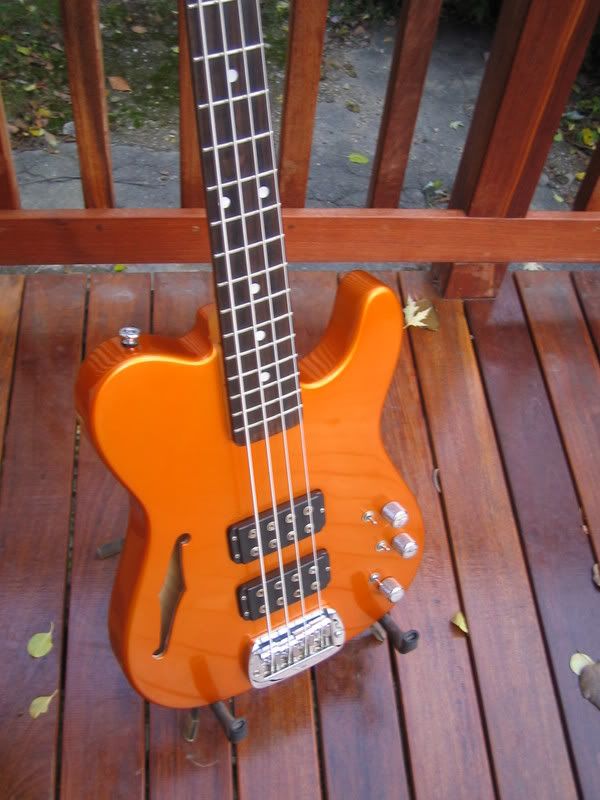
Finished up with the bass - and I really like how it looks !  Hopefully the customer will too!

After the pictures above, I applied several nice wet clear coats - to build up the depth of the color and protect the candy orange color.  Then some good old wet sanding with 800 and 1000 grit paper, followed by compounding and hand buffing and "viola" - a nice metallic orange finish.

I applied the replacement headstock decal that G&L was kind enough to send - using a decal setting solution (aka white vinegar) and then once it was patted dry and in place, a decal softner to really get it attached to the finish.  The next day I did a two light mist coats of the headstock with gloss acrylic lacquer - when those were dry, I did a heavier coat to really gloss the headstock and protect the decal.

After wiring up the bass - plugged it in for a little bit - very cool bass, I really must keep my eye open for one of these - would look pretty cool in Fiesta Red with white plastic pickup covers ??


3 comments:

1965 Gibson Heritage Acoustic top refin

Unfortunately I didnt think to take an actual "before" picture of this instrument, but this guitar had been modified to play left handed with a new bridge, had gold Grover tuners installed, had the headstock stripped and unfortunately had the top stripped, stained and then refinished in what appeared to be shellac with a brush.  Do not do this to your vintage Gibson acoustics !!!

The shellac refin was an orangey-brown color - dark enough that the beautiful tortoise-shell binding used on these guitars was hardly visible. The challenge was to try to refinish the top and lighten it up as close to what an aged natural finish on spruce would have looked like.

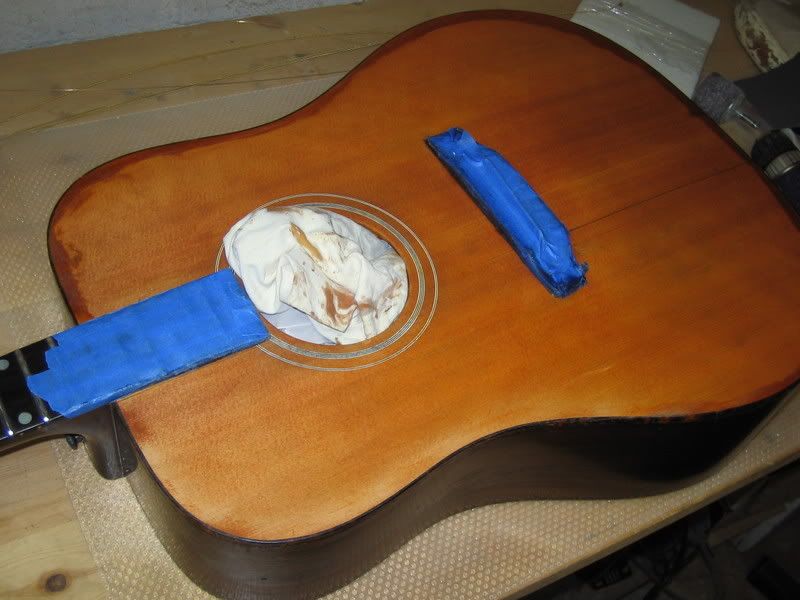
The inital step was to remove the shellac finish - I initially worked in a small area, just using acetone and a rag, and the finish did soften and start to come off, but this was going to take too long and I wouldn'ty be able to use the acetone near the bindings on edges and the soundhole anyway, as it would dissolve them.  So I used a milder type of finish stripper, called Citrix, which is somehow made from oranges (?) and will dissolve many finishes without attacking plastic bindings.  It will not work on "plastic" finishes however, such as polyurethane or polyester (think Squier Strat).  I stuffed the soundhole with newspaper and paper towel to keep everything out of the guitar.   This picture is after the first round of stripping, with the edges still left largely unstripped (note the color on the edges) and no sanding yet.


The top was finally completely stripped of shellac, but it was obvious that the top had been stained prior to being refinished. My hope was that the stain hadn't penetrated very far, and that by carefully sanding the top I could remove a thin, thin layer of wood and the stain.  Obviously, I didn't want to effectively thin down the top, as the top is the primary contributor to an acoustic guitar's sound - as well as being structurally critical.  After sanding and wiping down with denatured alcohol, this is what the top looked like - much better, but not bare wood.


I also sanded the finish that had been allowed to run onto the edge binding - notice how you can really start to see the tortoise shell now !

After confering with the owner, I decided to attempt to bleach the top to see if more of the stain would come off and also to even out the color of the top.  After looking online, it appeared that there were three approaches to bleaching wood: oxalic acid, a peroxide solution and good old chlorine bleach.  Each approach works on different types of stains - for example, oxalic acid is good for rust stains - bleach was the only approach that was identified as possibly working on dye stain.  I was a bit hesitant to try the bleaching, out of fear of warping the top, but as I said, I conferred with the owner and gave it a shot.  I brushed the bleach on, undiluted, and let it sit for approximately 8 hours before sponging and toweling off the top repeatedly with clean cool water.


The net result - well - maybe it lightened it up a bit, but nothing really dramatic (the top is wet in the picture above).  I don't think I'd try this approach again - as its risky with a non-solid body instrument, and I think that most wood dyes are not bleachable - they are designed to last !!

So then, the top was ready for a new finish - after some more fine sanding to remove any grain that had been raised by the water in the bleach and the rinsing process.  I used a gloss nitro that had a bit of a natural amber tint - and sprayed on several good heavy coats.


Note that the finish was still a bit uneven due to the stain having penetrated deeper into the wood in some areas - and not at all on one end of the bridge because glue from the new bridge had sealed the grain.  If you are going to stain your natural vintage guitar, do me a favor and first spray a nice thin coat of clear over the whole thing, and then in 10 years when you want me to refinish it natural, it will be a lot easier !!

What I did to even out the finish definitely falls into the category of "art" as opposed to "science" - I took a rag and some Minwax cherry stain (left over from doing doors in my house) - rubbed the rag on a scrap piece of wood to get most of the stain off - and the gently rubbed the lighter areas with the rag - so that just a little bit of the cherry stain (an orangey brown color actually) rubbed onto the new lacquer finish.  I was able to even out the top using this approach, without darkening the overall top.  I then sprayed a few more coats of clear onto the top, before wet sanding the entire top and hand buffing it.  I wasnt going for a mirror gloss finish - the overall finish is quite thin as it should be - primarily there to protect the wood and still show off the grain.

I resprayed the headstock gloss black and applied a headstock logo the owner had - the end result, while not looking like an unmolested Gibson Heritage should look, looked much better than it had. I also lightly wet sanded areas of the rosewood sides and back that had been scuffed up or had remnants of shellac on them and then buffed them out to reveal the amazing wood.


1 comments:

Squier Strat Quickie Paint Job

A customer acquired Squier of indeterminate vintage, for free I believe, and decided they wanted to "spiff" it up without spending a lot. Since the Squier had the typical poly urethane/polyester bowling ball finish and it was a heavy plywood body, we agreed that I'd leave the original finish underneath a new dark blue metallic finish. I am also installing a Dimarzio Humbucker in place of the stock Squier bridge humbucker.

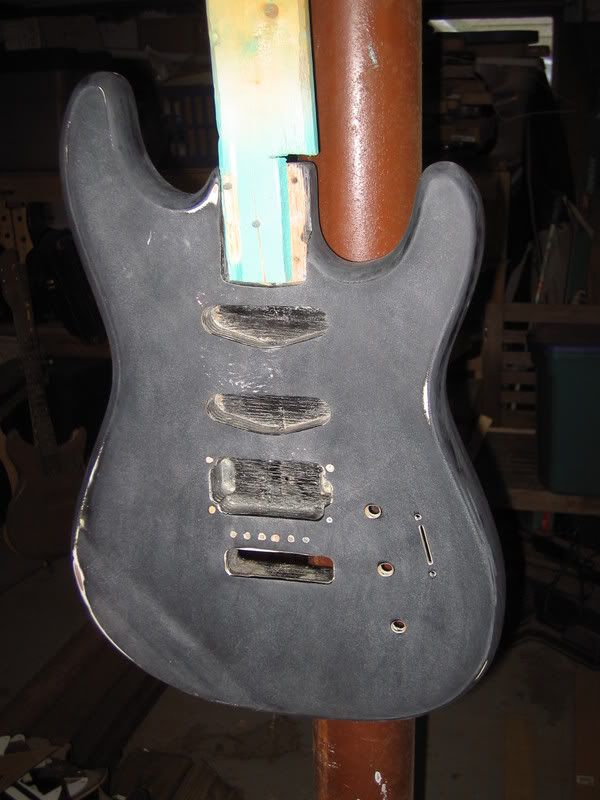
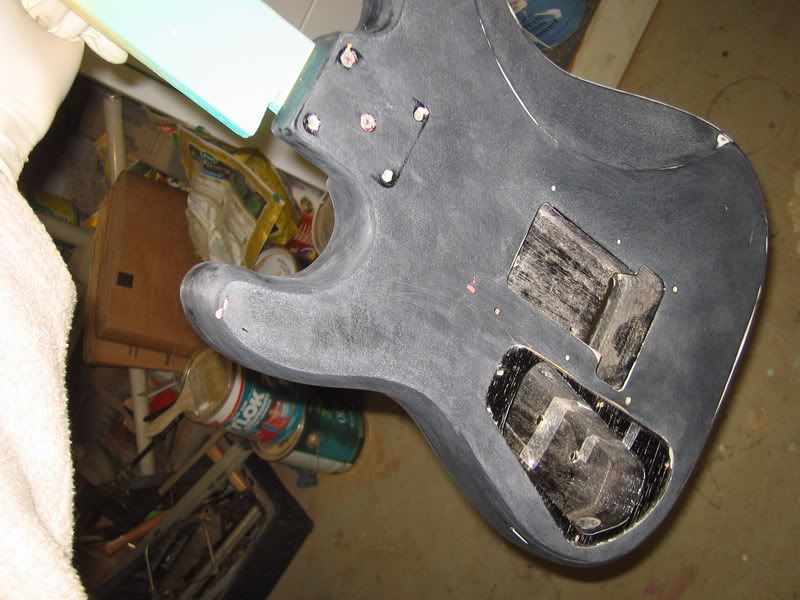
The first step was to disassemble the guitar and rough up the original black finish to give the new finish something to grip onto. I used a random orbital sander with a 100 grit pad for the front and back, and 220 grit wet and dry paper for the contours and edges. I then wet sanded the front and back with a block and 220 paper. This is what the body looked like after that:


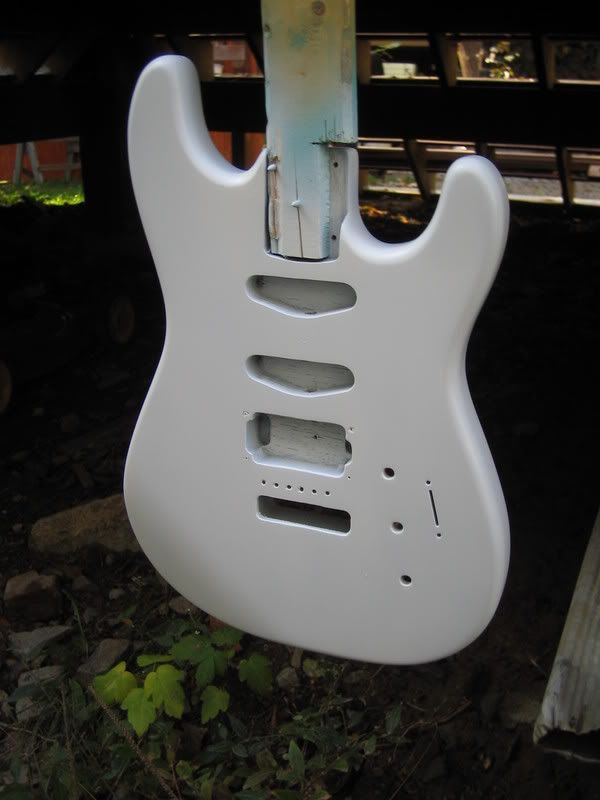
I then sprayed the body with a good heavy coat of Camger flat white nitro primer - which not only gives a good surface for the color coat but also helps fill in small scratches in the under coat.


Once the primer dried a few hours, I wet sanded it to smooth out the body, with 320 grit wet and dry paper. This removed some of the primer coat but not enough to warrant a second primer coat, especially since the body looked quite good. For the color coat, I used a can of Duplicolor acrylic lacquer in "Dark Blue", which is a dark metallic blue. I first just lightly coated the edges and then the front and back - and set the body aside for 15 minutes to let the solvent flash off.

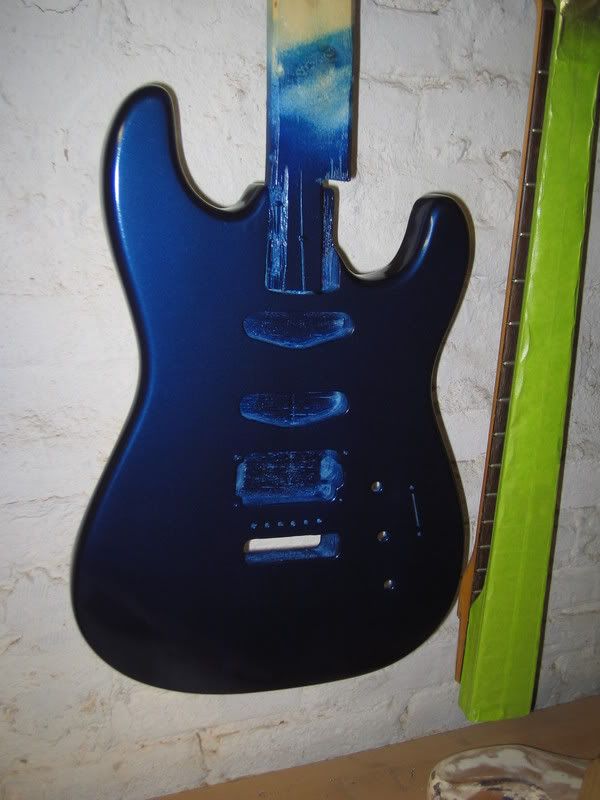
Then over the next half hour I built up heavier coats of color until I had complete coverage on all surfaces. This is the body drying after the initial color coat - looks pretty good already !!


Once this coat dries - I plan on wet sanding the body with 400 and 800 grit paper - and then applying one more color coat if there are any sand throughs. If there aren't, then I will move right to clear coats - I'll probably put at least 3 or 4 clear coats on, before a final wet sanding, compounding and buffing out.

UPDATE 3/13/07

Finally finished putting this strat together, with a Dimarzio pickup added at the bridge position. A few pics of the completed guitar.


0 comments:

1968 Gibson EB-3 Project

Yet another project - one of my favorite types of instruments to work on - maybe because there are so many abused examples out there ?

This is a late 60's Gibson EB-3 bass - structurally very similar to a 68/69 EB-0 I recently finished and sold on Ebay, but thats been through some trials and mods over the years.


The mods are minor and reversible - notably, the bridge position mini-humbucker was replaced with a Rickenbacker "toaster" pickup from a '67 Rick 4005 bass - as were all the electronics and knobs. This was actually one of the primary motivations for me to acquire this bass - I coincidentally have a mid-60s Rick 4005 bass in pieces - missing the electronics and one pickup - lost pieces eventually recirculate to their rightful places - perhaps I have stumbled upon a very material expression of the eastern concept of karma - "guitarma ??"

The main "trial" this bass has been through - besides having its cherry finish stripped - is that like many Gibsons, it suffered a headstock break. Apparently this was repaired by laminating a 1/8" thick piece of mahogany on the back of the headstock. Also, the Gibson logo was removed and replaced with an approximation in mother of pearl and there was an extra hole to fill in the front of the body for the added Rickenbacker "blend" knob.


The bass also had a replacement metal (steel?) pickguard and control panel cover and a chromed finger rest.

On the plus side - the bass had the original neck humbucker, bridge, mute assembly, tuners and hard shell case - and outside of two finger wear spots on the front of the bass and the extra control hole, the body was in excellent condition. I have the correct Pat # baby humbucker for the bridge position, repro knobs and will make a new pickguard, backplate and thumbrest.

The two parts I dont have are the brass control cavity shield and the 4-position Variatone switch. But I'll keep looking or simply install an SG-style toggle.

The first step after disassembly was to take down the headstock to the proper thickness on a belt sander - taking care not to make it uneven or TOO thin. I left the last little bit of the laminated piece on and used a sanding block to even everything out. Not surprisingly, there was no serial number remaining. I also had to recarve the neck to headstock transition - using my 65 EB-0 as a guide - not too tricky.


The headstock repair seemed very solid - no worries about it pulling apart - the laminated mahogany was an overkill type repair. And once everything was sanded down, there was nothing that a good solid color refin wouldn't cover up ! And I am very fond of Pelham Blue.

I plugged the control with a mahogany plug and then used some nitro based scratch filler on the deeper of the two wear marks and the control plug. This view is BEFORE sanding.


The body and neck were completely sanded and then grain filler was slopped on - and allowed to partly dry before I scrubbed off the excess. After drying overnight, I sanded the entire bass down again - using a sanding block, a random orbital sander and plain old sandpaper. I then sealed the filler with a good heavy coat of clear nitro sanding sealer - and the grain really "popped" after this treatment. I almost felt bad about covering that gorgeous wood up with blue paint ...


This is what a piece of mahogany with the grain properly filled should look like - notice that there is no filler on the surface of the wood - only in the grain, so that once a clear coat is applied, the wood has a mirror finish that still emphasizes the grain of the mahogany.

I used my Pelham Blue Melodymaker as a guide on matching the color - since the MM is heavily yellowed, I had to look for places it was well worn to get an idea of the original color - which is a surprisingly bright metallic blue, that of course appears green after 40 years of the top coat yellowing. I'll try to post a few closeups of the MM later - but meanwhile, here is the EB-3 with the first few color coats on.


(added Oct. 24th, 10:30 am)

OK, here are a few pictures of the EB-3 compared to the original Pelham Blue finish, beat-to-hell Melodymaker guitar. Notice how the different light radically changes the appearance of the Pelham Blue - the pictures above were taken under my shop neon lights - the ones below were taken under low-power halogens.

The first picture is a close-up of one area on the MM where the top coat has worn off and left some of the original finish exposed - compare this to the picture above and you will see how close the two metallic blues are.

This guitar was played to death - lots of mojo.


Then here is a pic of the EB-3 by itself (some parts just placed) and side by side with the MM. I'd have to do a lot of yellowing to match that color !!


( Updated Oct. 26th, 11:30 PM)

OK - so I touched up the Pelham Blue - looked pretty much perfect, and then began applying a yellowed/ambered topcoat to start getting the EB-3 towards the proper aged green look.  A tricky proposition to get a nice even color - but I made a good start - Sunday I'll try a lighter tinted coat and try to even out the back and get the front a little bit greener - and do the back of the headstock too!

A pic of the front of the bass - and then a picture of the neck with yellowing and headstock without yellowing to show the contrast.


9 comments:

Recording a band using Garageband and my Mac Mini

Ok - again I'm off the topic of guitar refinishing and repair, but still a topic thats of interest to most guitar freaks - recording !

I have been a long time fan of Apple - and always had a Mac of one sort or another. When the Mac Mini came out a few years ago, I was eager to get one in part because of the low price ($700 with a dvd burner), in part because it was TINY and COOL looking, and in part because I wanted to try out Garageband, Apples freebie multitrack recording software.

My current recording rig consists of :

- NADY 8-channel preamp, about $100 from musician's friend

- borrowed MOTU 828 analog to digital converter thats quite a few years old (you can find these used for around $300)

- early Mac Mini, with 1.25 GHz G4 processor and 1 GB memory & 19-inch Xerox monitor

My band had played with a band named 92 Protons, and I really liked their sound and also their whole persona - especially Lacey, their guitarist and primary vocalist. After watching their set I suggested that they come down to my band's practice space sometime and we do a real fast simple recording (the demos they had were pretty poor in sound quality). I wanted to do a live recording, no overdubs - everything at once - with minimal post-production.

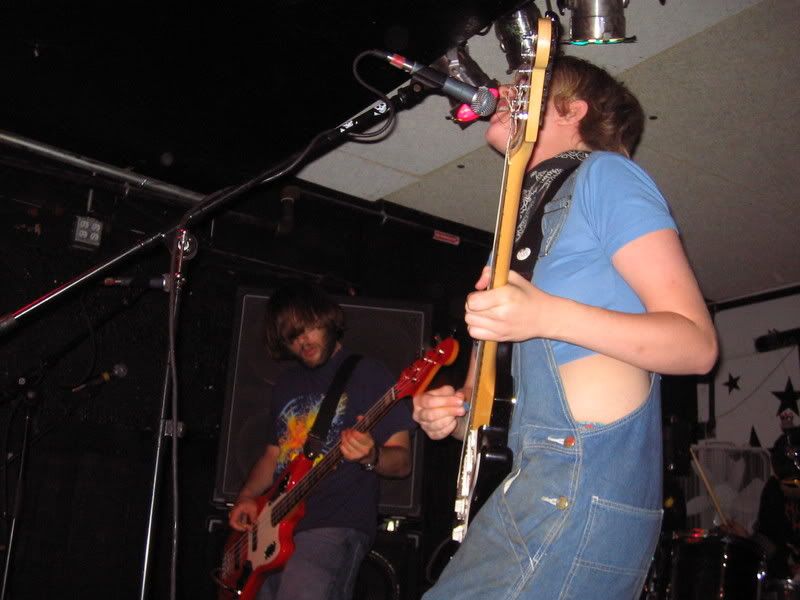
92 protons at Abbey Lounge

A few weeks later we found a Friday evening we could do the recording and we all got together at the practice space. Because I didnt want my computer to crash during recording and because I hadnt yet received my set of mics from Musician's Warehouse, and was relying on what I could scrounge up, I decided to limit us to 6-tracks of recording.

Mic arrangement was as follows:
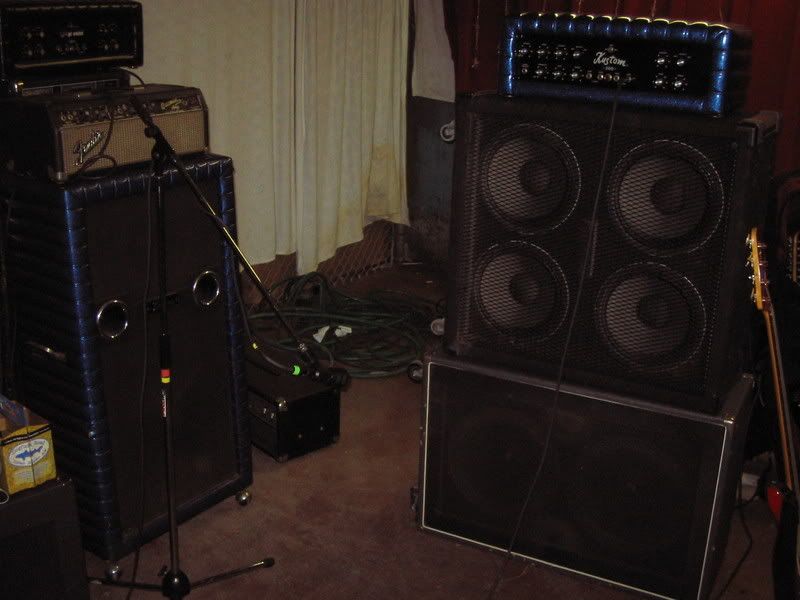
bass - One mic about 4 ft in front bass stack of a 2 X 15 cabinet and a 4 X 12 cabinet driven by a 1967 Kustom blue sparkle head

bass mikage

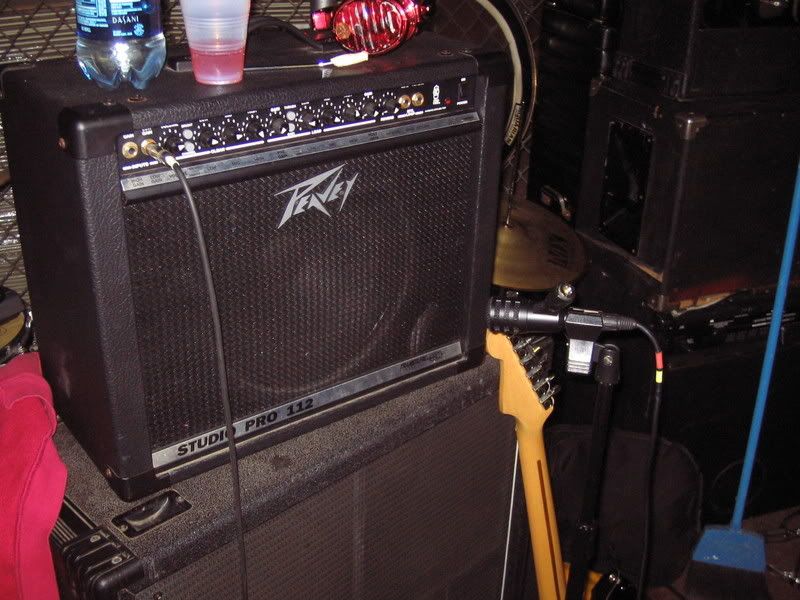
guitar - one mic off-angle, about 12 inches away from speaker of Peavey Studio Pro 112

guitar mic

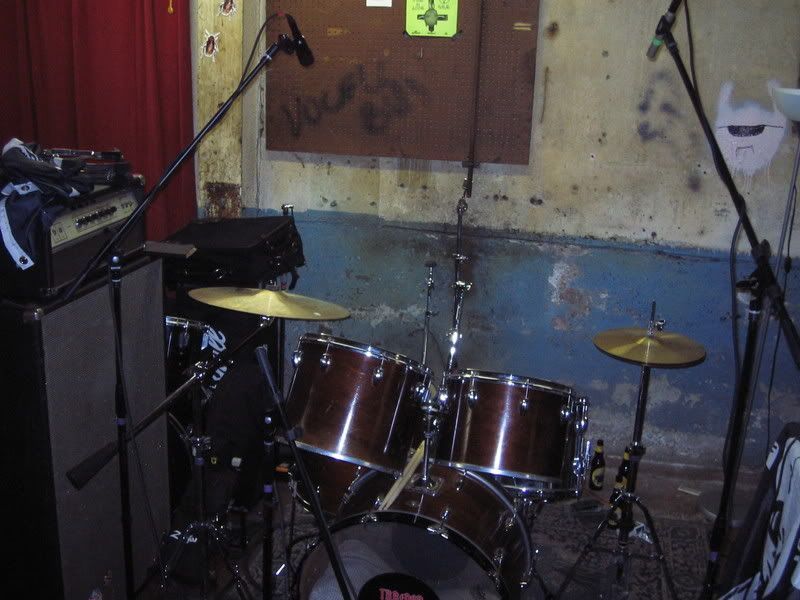
drums - three mics, one a foot in front of the kick drum, and two overheads; one a condensor mic pointed down at the snare and hi-hat; one a normal mic pointed at toms. Kit was an early 70s Slingerland kit with no bottom heads and a HUGE chrome marching snare.

drum mics

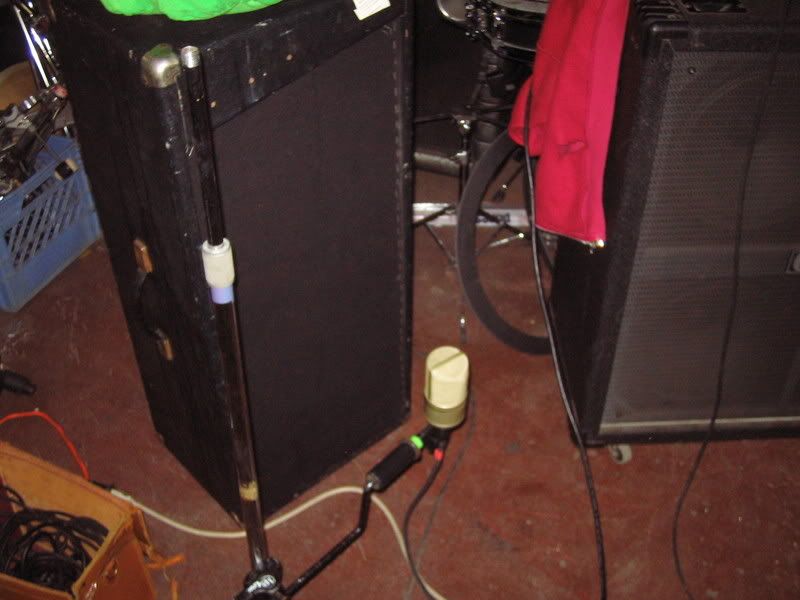
vocals - one mic in front of a small PA monitor, with vocal mics (Shure SM 58s) feeding into a small Sunn PA head. The miking the PA is an old Iggy Pop & Stooges trick - check out their album Funhouse. A good trick to get a "live" grittier vocals sound.

vocals recording

It took nearly 2 hours to set up everything and sound check - mostly because I had to sort through the cables and mics I was borrowing to make sure everything was working. I think with my new mics and cables I could cut this time almost in half next time.

We then began recording - and 92 Protons played like pros - there was only one song that was "messed up" and had to be redone - and there was one other 2nd take. Two hours later, we had succeeded in recording 8 tunes - for a total of roughly 35 minutes of material - essentially a CD. This included time taken up switching around vocals, as TJ (drums) sang one song and Matt and Lacey sang together on a few others.

I did a few different mixes - mostly compressing the vocals, some guitar and a little bit of the drums - and then adding some reverb to the drums, vocals and guitar. I stayed away from compression of the whole mix - though this is still an option. The resulting mix was posted by 92 Protons on LastFM.com as the album "Vast Deferens" and you can hear it for FREE by clicking here. Drop them some love mail if you like what you hear !!

The clip below shows the monitor, with 6 tracks recording at once - no separate recording booth for me - just a little pine desk.

0 comments: