1978 Fender Jazz Bass Refin Project

(originally published 12. October 2007)

I just started a new project on behalf of a customer this past Wednesday - its a 1978 Fender Jazz bass thats been through a lot and had a partial refin over the years. The bass has replacement tuners and bridge (Schaller) and newer control pots, but the pickups are original, as are the frets, string nut, headstock decal, neckplate and control plate. The body finish appears to be original black, but has been oversprayed black to cover chipping and wear in a number of places. The neck was all original, except that it appeared that the back of the neck had been stripped at one point and then shellacked or something with a finish that was now completely flaking off. The headstock may have been oversprayed - though its persistent glossiness may be due to a poly top coat instead of the nitro top coat Fender used in earlier years.

back of neckneck pocket

We met and discussed what he'd like to do and decided that the body should be stripped first - and then depending on the condition of the wood, I'd do a refin in natural, transparent red or Olympic white. The tuners will be replaced with Hipshot Vintage tuners, with a detuner on the E-string. The customer wants a BadAss II bridge for the sustain and adjustability. Most likely the bass will get a black pickguard, though a tortoise shell pickguard with yellowed Olympic white would look very cool !!

Unfortunately this Jazz bass is from the era of Fender polyurethane "bowling ball" finishes - as was the Musicmaster in my prior post. I took off some of the finish just at the edge of the body to see what I was going to be dealing with - no fun !!

top edge of bodyback of body

The good news was that under the black finish was a solid clear sealer coat - which would protect the ash body underneath as I stripped it. Since I realized how tough and thick the finish was, and that paint stripper probably wouldn't attack it - I decided I could use some fairly aggressive methods to remove it. This meant a random orbital sander with a heavy grit/no clog disk, a smaller Craftsman 3-D sander for the back scoop, and a square palm sander with heavy grit (100) paper for getting some of the edge finish off.

My strategy was to use the heaviest grit papers until I started to see the clear coat peeking through, and then switch to finer grits to clean up the clear coat so that I wouldn't leave any deep scratches in the clear coat and certainly wouldn't cut into the wood. Below are my results after a combined total of roughly 2 hours of sanding - the front and back are down to the clear coat and the edges are started.

front partially stripped
back mostly stripped

As you can see, the wood looks great - and there are almost zero flaws/dings that would need to be filled. This body will be an excellent candidate for a clear or other transparent finish.

I estimate it will take me about another 2 hours of work to get the rest of the black finish off, though I am not going to strip out the control cavity, pickup routings or the neck pocket.

(Added on 10/12/07 at 1:11 pm)

Ok, so the black finish is off and the body just requires a little light sanding and few small dings filled before its ready for a clear sealer coat. The existing sealer coat did get sanded through in places along the body edge, but I only hit wood in one area, inside of one of the cutaways. I did wipe the body down with denatured alcohol, and while it was still wet the grain of the wood looked excellent. The forecast is for some dryer Fall weather this weekend, so I anticipate clear coating it over the next day or two.

front strippedback stripped

(Update Oct. 25th 6:30 PM)

Finally got a few things out of the way and the humidity dropped - and I sprayed the Jazz body with a transparent red color coat. I did this with a little lighter touch than the Musicmaster - as I really wanted the figured wood to show through. Once this is dry, it will get multiple clear coats and then a wet sanding and buffing out - I think its going to look outstanding!!


Parts just came in the mail - so this bass will be going together soon !!

(Update Nov.2, 2007)

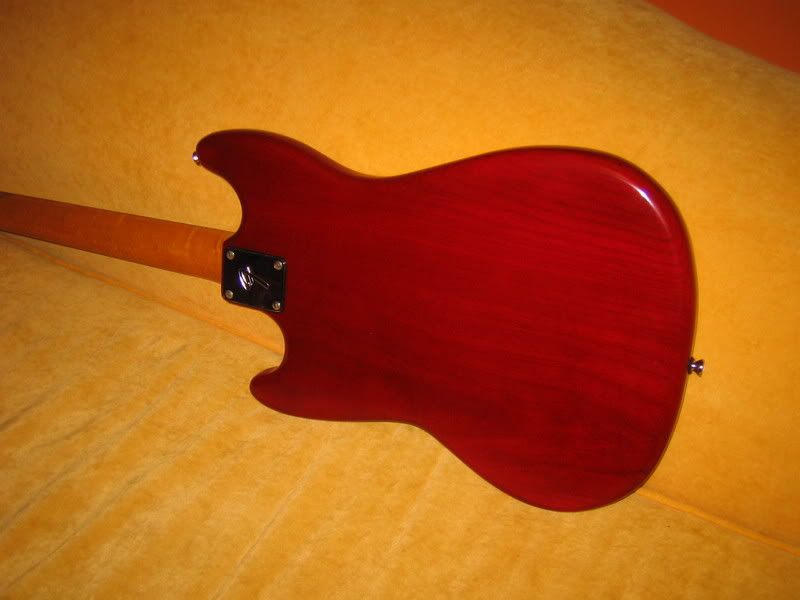
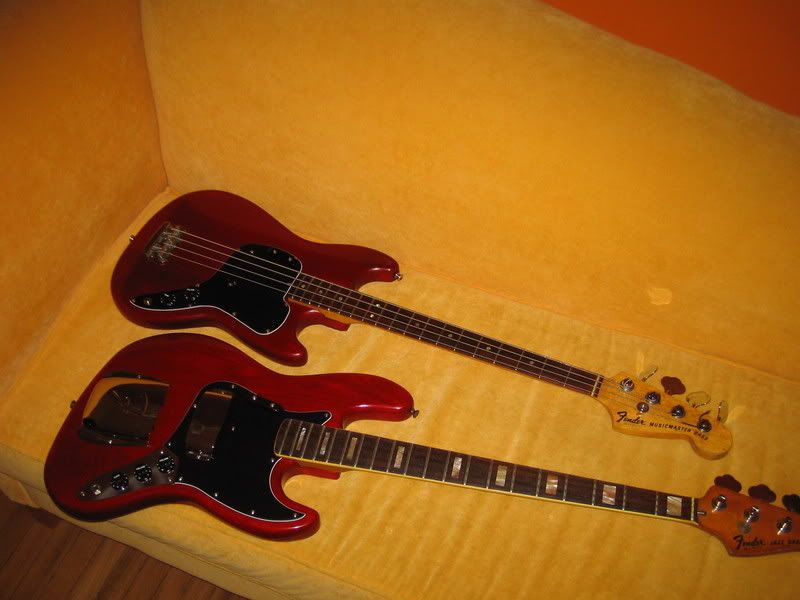
Finally wet sanded and buffed out the body. I'm still waiting for the knobs and a new control plate, but I bolted the parts together and snapped a few pictures.  A transformed bass.  I refinished the back of the neck too in an aged amber nitro - not quite the proper slick-o-rama 70s poly finish - more like a nice worn in 60's neck.


1 comments:

1978 Musicmaster Bass Project

(originally posted 8. October 2007  on http://s217476017.onlinehome.us/)


Hi there,

I decided that a blog would be a more flexible forum for me to not only share info and pictures covering guitar projects I'm working on, but also just generally discuss topics related to musical instruments and even recording. This was I can keep my "business" website more focused on just that - whereas here the topics can be more free ranging and I can go into more detail on my projects.

At any given time, I have a number of projects underway - some long term, some shorter term. I just recently restarted work on a 1978 Fender Musicmaster Bass.

I have a fondness for the Fender Musicmaster - especially the earlier ones, which have very lightweight alder or poplar bodies and slimmer necks. However the later ones are also good playing instruments, and I have found the single-coil pickups (which are strat pickups with 6 flat polepieces) to be very powerful - with a less compressed sound than a P-bass for example. I have used a Dakota Red '74 Musicmaster bass with flat wounds for both recording and gigging on many occasions - it sounds great through a high gain amp or my Big Muff Pi pedal !

This particular Musicmaster bass is being assembled from parts, mostly found on Ebay over the years, with the remained purchased new or made by me. I started with a badly defretted but otherwise solid neck and an oversprayed black late 70's body.

The fretboard of the neck required repair of some major chips when the frets were brutally removed (not by me!), which was accomplished with rosewood saw dust and "crazy glue". The neck was refretted with Stewart-Macdonald jumbo fretwire, and should be a nice playing neck.

The body was largely undamaged, but the original black finish had been oversprayed with more black - and also had some kind of symbol scratched into the back surface of the upper horn. I decided to sand off the polyurethane finish, and it surprisingly came off very nicely and evenly and revealed a very nice ash body under the finish - a 3-piece body, but with the grain matched so that it looks almost like a single piece of nicely grained wood. The only problem was the scratched in design on the back and a little divot out of the butt end of the body.

I scratched out the black paint left in the design on the back and the small divot, and then filled them with crazy glue - which I then sanded down flush. I did contemplate spraying the body an ambered clear, since much of the clear sealer coat was still on the wood, but I decided to go for the more interesting transparent red finish that Fender used for a few years during the late 70's.

To my eye, the color has a slightly browned and ambered tint - something that takes the edge off a pure cherry red color. I first sprayed a clear coat of sanding sealer, which required very little sanding (see first picture), and then mixed a lightly tinted finish of red and yellow stew-mac dye, with some powdered burnt umber pigment mixed in, and sprayed an initial color coat (second picture). The result looked cool , but not what I was going for.

Clear coated with sanding sealerFirst color coat, orange tint

After letting the first coat dry for a few days - I mixed up another batch of lacquer, this time going very heavy on the red dye and adding a little more burnt sienna. I sprayed this on in several coats - I unfortunately got one run on the upper horn (which I'll wet sand out), but now the color is really what I wanted. For comparison purposes, check out the 1978 Musicmaster that Brian Goff recently had for sale in Bizarre Guitars Ebay store.

First red color coat, unsanded

After wet sanding the whole body, I'll apply one more lightly tinted color coat and then several clear coats, before a final wet sanding and buffing out. Look for another post on this project in a week or two.

(Update Nov. 9th, 2007)

Finally I got around to finishing up the Musicmaster Bass - I tried out my new Sears 6 inch Buffer to buff out the finish and it worked great - will make my life much easier !

I also had to scrounge up the rest of the parts, wire up the bass and do a little fret work on the refretted neck - one lose fret and a few high spots here and there, plus then setting up the entire instrument once it was altogether. Its turned out to be a really nice looking bass and it plays well, though I dont like it as much as my 74 Musicmaster, which has a smaller neck in general and is lighter.

The parts I used with the refretted neck and refinished body are as follows:

- original bridge, neckplate and pickup cover

- replica 3-ply pickguard, reissue Fender thumbrest and knobs, aftermarket strap buttons, string retainer

- Dimarzio strat pickup, Stew-Mac 250K pots, modified Ping tuners and string ferrules

The completed product below - and a snapshot with its big brother 78 Jazz bass.

Completed 78 Musicmaster Bass


1 comments:

Transferring my guitar refinishing and repair blog here

I have finally gotten around to getting a domain name for my blog that actually means something - as opposed to a string of letters and numbers I cant remember.

So welcome to the Guitar Garage !!   Inspired of course by all those "garage" shows on cable - but instead of hot-rodding a '65 Mustang Fastback or custom building Harley-powered chopper,  I'll be covering my endeavours in restoring, hot rodding and custom-building basses and guitars.

I'll also be covering other  musical topics at time, such as my recording experiences and the occasional live show.

I plan on copying over my entries from my original blog as well, since there's a lot of good material there I think.

1 comments: