My expectations were kind of low on how well it would turn out, but in the end it turned out to be perhaps the nicest playing 66 P-bass I have had my hands on. It currently resides in Norway, where it rocks out on a weekly basis with its new owner. I expect it to have at least ANOTHER 40 years of rock n rolling in its bones.
This bass started out with a neck I purchased on Ebay many years ago - as a refret project. The neck was advertised as having trashed, worn out frets but otherwise in good shape. When I got the neck I looked at the frets and thought that there was still enough meat on them to keep em, but someone had done a real hamfisted job on removing the tuner ferrules - with what looked like a fat screwdriver - scratching up the headstock. Other than that, the neck was solid and cosmetically fine.
About a year later - I found a severely hacked mid-60's P-bass body on Ebay. Some rocket scientest had set up this poor bass with the following: a Gibson bass "mudbucker" at the neck, a P-bass pickup in the middle and TWO jazz bass pickups at the bridge - the poor Precision had THREE massive Gibson-sized holes (I won't call them routings, since it looked more like 5th grader with a dull chisel had cut them out) in its face, and of course, an expanded control cavity for some extra pots, switches, batteries and such.
I wish I had "before" pictures of the body - I did save the pickguard that was on it - and that probably says enough ..

However, to quote Lou Reed, "despite all the amputation .." - the contours of the bass body were in great shape - the rear scoop was nice and deep - the doweled pin marks were in the right place, etc etc. The depth of the rear scoop actually made me think this might be an earlier body, but more on that later.
Sometime after getting these two key components, I found a refinished black 66 P-bass on Craigslist - a very nice bass - for $700 - and this project got back-burnered big time.
Over the next several years - as I constantly/semi-obsessively gathered up vintage Fender parts - I eventually had many of the missing pieces to assemble a 66 P-bass - I found a set of tuners, a neckplate with someones SS# scratched into it, an older bridge (though the pedigree of the saddles was questionable) and a SWEET grey bottom pickup.
So the project came back to life. Obviously the biggest task was to restore the horribly mangled body. Once I had the bass strung up, I'd decide on a neck refret.
Step one was to clean up the areas that needed to be blocked with a router, so that the bottoms were at a consistent depth and I could get a good glue bond for the blocks I'd be installing. I then cut the blocks out of matching alder wood (from Stewart-MacDonald) and glued them in with tightbond and clamped them.

Of course there were gaps around the odd-shaped blocks - which were filled with smaller pieces and shavings of alder and titebond - with a minimal amount of cellulose filler used to do a final fill in. I wanted to use alder wood to the greatest extent possible so that there wouldn't be shrinkage problems down the road. I also used blocks that extended SLIGHTLY above the height of the rest of the body as I knew that the freshly cut alder blocks would probably shrink a tiny bit.

I let the blocked body dry out and settle in for several weeks - kept it in a dry place in my attic. The picture below shows all the blocking done, with a smear of wood filler over the boundaries before I began sanding to level the entire top.
Once the top was level and smooth - I marked out the location of the pickup route and the control cavity, to try to return them to as close to the original configuration - and then routed these out.

Now the body was looking pretty decent - and though the blocking and glue had added some weight relative to an all original body, the body was still lightweight at 4 lbs, 10 oz. I then stained the body back to the original yellow and sealed the stain with a coat of vinyl sealer (similar to the Fullerplast sealer Fender used in the 60s). The picture of the butt end of the bass body shows some remnants of the original yellow stain.


Next came a coat of white lacquer primer - followed by a little glazing putting in the remaining rough spots - some wet sanding - and another thin coat of white primer.


Now the body was finally ready for the color coat. I used ReRanch's Sea Foam Green nitrocellulose - which comes in high quality spray cans - it typically takes about 1 1/2 cans to do an entire body . The color went onto the white primer beautifully - and looked gorgeous even before wet sanding and clear coating. Notice how my flash photos make the color look almost like Daphne Blue, whereas other colors show of the green tint more.


After several rounds of wet sanding and color coats - the body was clearcoated - without any tint - and then buffed out to not-too shiny finish - I didn't want it to look brand new. The neck was bolted on - and this is when I realized that this WAS a late 66 body to match the neck - because the neck was exceptionally wide at the heel - and didn't fit my earlier 66 or 63 P-bass - but fit the body I had redone incredibly well !! And one the bass was strung up - I just had to file three frets at the high end of the fretboard and the bass played beautifully all the way up and down the neck - no need for a refret for at least another decade or two !!


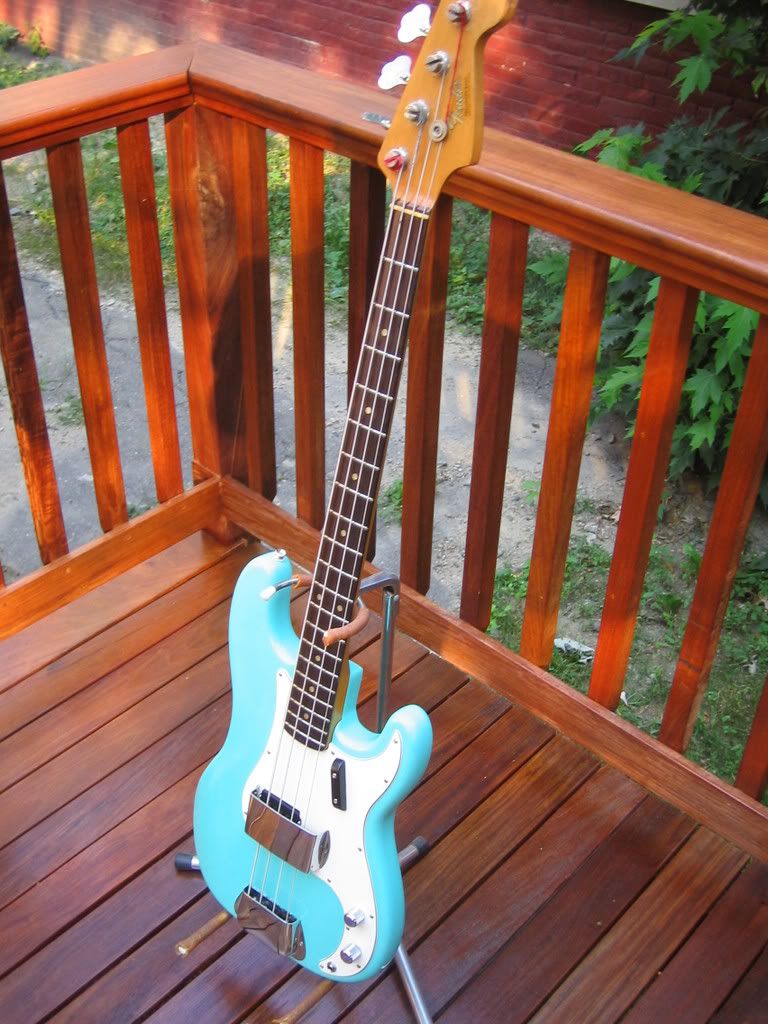
Here is the completed bass - just before its trans-Atlantic trip to the land of Fjords and Viking-rockers !!


This is almost the color I want to put on my Ibanez remodel. Maybe the Daphne Blue is more like it- I love the very pale, blue-turquoise color. Anyway this looks great. Beautiful color for the outdoor shots.
ReplyDeleteHi Roger - I can always start with the Daphne Blue or the Sea Foam green as a reference and then adjust it to me more blue or more green or paler by adding white to it - so let me know. The real challenge is when I'm trying to match a vintage color - with the Ibanez it would truly be "custom" so whatever you want is what's "right".
ReplyDelete